Welcome to the Stars of a Thief guide, your ultimate resource for navigating this challenging Tall Tale in Sea of Thieves. Discover how to decode constellations, solve riddles, and unlock hidden treasures with ease, ensuring a smooth and rewarding adventure across the high seas.
Overview of the Tall Tale
The Stars of a Thief Tall Tale is a captivating adventure in Sea of Thieves that challenges players to decode celestial clues and solve riddles. This quest revolves around tracing constellations, using an enchanted spyglass, and uncovering hidden treasures. Players must navigate to an underwater vault, align symbols with constellations, and solve a final poem puzzle to unlock rewards. The tale is known for its complexity, requiring careful observation and strategic thinking. This guide provides a detailed walkthrough to help you master the challenges and claim your rewards seamlessly.
Importance of the Guide
This guide is essential for navigating the intricate challenges of the Stars of a Thief Tall Tale; It provides clear, step-by-step instructions to decode celestial clues, solve riddles, and unlock the underwater vault. Without a guide, players may struggle with interpreting star symbols and aligning constellations, leading to confusion and wasted time. By following this guide, you’ll avoid frustration and ensure a smooth progression through the tale, making the most of your adventure and securing all rewards seamlessly.
Starting the Quest
Begin your adventure by locating The North Star Seapost, where you’ll meet Sudds, a charming merchant. Vote for the voyage with your crew to receive the Tale Book, marking the start of your journey.
Locating The North Star Seapost
To begin the Stars of a Thief Tall Tale, navigate to The North Star Seapost, a small, remote island marked on your ship’s map. Zoom in to locate it precisely, as it can be easy to overlook. Once arrived, disembark and approach Sudds, the Scottish merchant, who will provide the Tale Book. This book is essential for guiding you through the quest, so ensure you interact with Sudds and vote for the voyage with your crew to proceed.
Interacting with Sudds and Voting for the Voyage
Upon arriving at The North Star Seapost, approach Sudds, the Scottish merchant, who will present you with the Tale Book. Engage in conversation with him to initiate the quest. Once ready, gather your crew and vote for the voyage to officially begin the Stars of a Thief Tall Tale. After voting, open the Map Radial menu to access the Tale Book, which will guide you through the adventure. Use the Primary Use button (Left Mouse Button/Right Trigger) to interact with it and uncover the first clues.
Receiving the Tale Book
After voting for the voyage with your crew, you will receive the Tale Book for the Stars of a Thief Tall Tale. This book is essential for guiding you through the quest and can be accessed via the Map Radial menu. Open the menu, select the Tale Book, and use the Primary Use button (Left Mouse Button/Right Trigger) to view its contents. The book contains cryptic clues and riddles that will lead you to the enchanted spyglass and the star jewels, setting you on the path to solving the mystery.
Understanding the Tale Book
The Tale Book guides your quest, accessed via the Map Radial menu. Use the Primary Use button to view clues for the enchanted spyglass and star jewels.
Navigating the Map Radial Menu
To access the Tale Book, open the Map Radial menu using the mouse wheel on PC or the d-pad on consoles. Select the book icon to view its contents. The menu allows you to track progress, review clues, and plan your next steps. Use the Primary Use button to interact with the book, revealing essential information about the enchanted spyglass and star jewels. This feature is crucial for deciphering riddles and locating hidden items, ensuring you stay on course throughout the quest.
Using the Primary Use Button for Tale Book Interaction
Interact with the Tale Book using the Primary Use button (Left Mouse Button on PC or Right Trigger on consoles). Pressing this button allows you to open and examine the book, revealing crucial clues, riddles, and maps. The Tale Book is essential for guiding you through the quest, providing details about the enchanted spyglass and star jewels. Regularly check the book for updates as you progress, ensuring you never miss a vital piece of information to unlock the next step in your adventure.
Acquiring the Enchanted Spyglass
Find the enchanted spyglass on either Rum Runner Isle or Twin Groves, depending on the clue in your Tale Book. Follow the instructions precisely to locate and retrieve it.
Following the Clues in the Tale Book
The Tale Book provides cryptic clues to locate the enchanted spyglass. If it reads, “Face the North Star,” head to Rum Runner Isle and find the spyglass near a solitary hanging lantern by the shore. If it states, “My back to the North Star,” journey to Twin Groves and dig beneath a tree between the two largest rocks. These clues are essential for progressing in your quest and unlocking the next steps in the Tall Tale.
Locating the Spyglass on Rum Runner Isle
Head to Rum Runner Isle and search near the shore for a solitary hanging lantern on a tree. The enchanted spyglass is located directly beneath this lantern. Dig at the spot to retrieve it, ensuring you’ve followed the Tale Book’s instructions precisely. This step is crucial for advancing in the quest and unlocking the next phase of your adventure.

Locating the Spyglass on Twin Groves
On Twin Groves, head to the area between the two largest rocks on the island. Dig beneath a tree situated in this prominent location to uncover the enchanted spyglass. The Tale Book will guide you with the clue, “My back to the North Star,” directing you to this specific spot. Retrieving the spyglass here is essential for progressing in the quest and deciphering the celestial clues that follow.

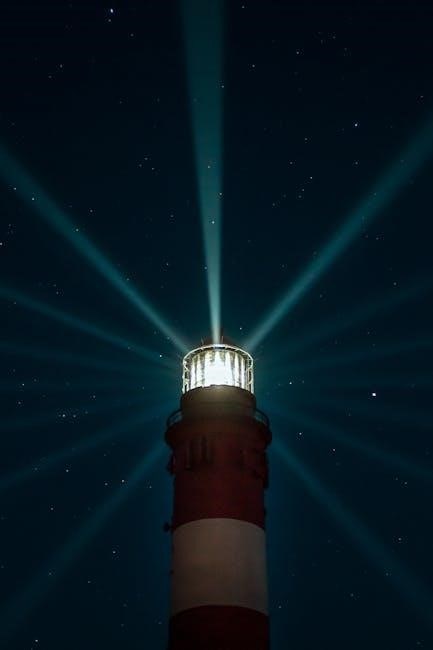
Using the Enchanted Spyglass
Equip the spyglass and use the Primary Use button to activate it. As you observe the stars, they will transform into symbols, guiding you toward the next steps in your quest.
Equipping and Activating the Spyglass
To use the enchanted spyglass, open your quest radial menu and equip it. Once equipped, press the Primary Use button (Left Mouse Button/Right Trigger) to activate it. This will allow you to observe the night sky and identify constellations. As you gaze through the spyglass, stars will transform into symbols, which are linked to the index in your Tale Book. These symbols will guide you toward the correct compass directions, helping you decipher riddles and locate the Star Jewels needed for the vault puzzle.
Interpreting Star Symbols and Compass Directions
When using the enchanted spyglass, observe the star symbols that appear. These symbols correspond to constellations in your Tale Book’s index, providing crucial clues. Each symbol is linked to a specific compass direction, such as North-East or South-East. For example, the Boar constellation points North-East, while the Feather constellation indicates South-East. Use these directions to navigate toward the correct islands and underwater locations, ensuring you follow the riddles accurately to uncover the Star Jewels and progress through the quest.

Solving the Riddles for Star Jewels
Decoding riddles in the Tale Book reveals constellation clues and compass directions, guiding you carefully to the hidden Star Jewels by aligning symbols with specific sea paths.
Decoding the First Riddle
The first riddle in the Tale Book requires careful analysis. Identify key symbols and align them with constellations in the sky using the index provided. For example, if the riddle mentions the Boar constellation, locate it in the North-East direction. Follow the compass guidance to reach the designated island. Use the enchanted spyglass to confirm symbols and directions. Once aligned, dive into the underwater grave off the South-West shore to retrieve the first Star Jewel, ensuring you follow the cryptic clues precisely for success.
Decoding the Second Riddle
The second riddle builds on the first, requiring you to interpret new constellation clues. Use the spyglass to identify symbols like the Feather (South-East) or Arrow (South-West). For example, if the riddle mentions following the Feather to a spire, head South-East from Kraken Watchtower to Shipwreck Bay. Then, track the Arrow constellation to an unmarked island. Dive off the South-West shore to find the second Star Jewel in an underwater grave. Precision is key to unlocking this riddle and progressing in the tale.

Locating the Underwater Vault
The underwater vault is located at N13 on the map. Navigate to the west side of the island and swim through the cave to reach the vault entrance, essential for placing the Star Jewels.
Identifying the Vault Location on the Map
The underwater vault is marked at coordinate N13 on the Sea of Thieves map. It is situated near an uncharted island, identifiable by its unique rock formations and secluded caves. To locate it, open your map and zoom in on the N13 region. The vault entrance is hidden beneath the waves on the island’s western side. Swim down to the underwater cave to access the vault, where you will place the Star Jewels and progress through the tale. This location is crucial for unlocking the next stage of the quest.
Navigating to the Vault Entrance
Once you’ve identified the vault location at N13, navigate to the uncharted island marked on your map. Anchor your ship nearby and swim to the island’s western shore. Dive underwater to find the cave entrance, located beneath the waves. Follow the tunnel to reach the vault chamber. Ensure you have the totem obtained from the statue to unlock the vault door. This step is critical for progressing through the tale and claiming your rewards. Be prepared to solve the final puzzle inside the vault to complete the quest.
Completing the Vault Puzzle
Study the poem in the Tale Book to link each line to a constellation symbol. Align these symbols on the rotating blocks to unlock the vault. Timing is crucial, as incorrect alignments can flood the chamber. Use the index in your book to match symbols accurately and progress without drowning. This puzzle requires careful observation and quick action to succeed.
Understanding the Rotating Block Mechanism
The rotating block mechanism in the vault requires aligning symbols with constellations from the Tale Book. Each block rotates independently, and players must match the symbols to the corresponding constellation clues. The poem in the Tale Book provides hints, linking each line to a specific symbol. Correct alignments unlock the next step, while incorrect ones trigger a flood, adding pressure to solve quickly. Use the index in your book to identify symbols accurately and avoid errors. Timing and precision are key to progressing through this puzzle successfully.
Aligning Symbols with Constellations
To align symbols with constellations, study the poem in the Tale Book and match each line to a constellation clue. For example, the Warmonger refers to the Great Warrior symbol, while the Patient One corresponds to the Turtle. Use the index in your book to identify symbols accurately. Aligning the blocks correctly unlocks the next step, but incorrect alignments trigger a flood. Pay close attention to the descriptions and ensure each symbol matches its constellation counterpart to progress without penalties and avoid drowning. Precision is crucial in this step.
Placing the Star Jewels and Obtaining the Totem
Insert the Star Jewels into the underwater statue at the uncharted vault. Retrieve the totem and notes below the statue to progress in the quest.
Inserting the Jewels into the Statue
Locate the underwater vault at N13 on the map and swim to the cave on the west side of the island. Approach the statue and insert the Star Jewels into their respective slots. Once all jewels are placed, retrieve the notes below the statue for additional clues. This action will grant you the totem, a crucial item for progressing through the quest. Ensure the jewels are aligned correctly to unlock the next stage of the adventure.
Retrieving the Totem and Notes
After inserting the Star Jewels into the statue, a totem will be revealed. Pick it up, as it is essential for unlocking the next vault. Additionally, collect the notes located beneath the statue for crucial clues about the totem’s purpose and the final puzzle. These notes will guide you on where to place the totem, ensuring you progress smoothly through the quest. The totem’s design often hints at its intended location, so examine it carefully before proceeding.
Final Vault Puzzle and Reward
Solve the poem puzzle by aligning symbols with constellations. Correctly rotate the blocks to unlock the vault and claim the Shroudbreaker, then return it to Sudds for rewards.
Solving the Poem Puzzle
To solve the poem puzzle, study the final page of the Tale Book. Each line corresponds to a constellation symbol, which must be displayed on the rotating blocks. For example, “The Warmonger” refers to the Great Warrior symbol, while “The Patient One” represents the Turtle. Match each stanza to its symbol, ensuring the correct alignment. Failure to solve it before lighting the braziers will flood the vault, so accuracy is crucial. Successfully completing the puzzle unlocks the vault and rewards you with the Shroudbreaker.
Unlocking the Final Vault
After solving the poem puzzle, insert the Shroudbreaker into the designated slot to unlock the final vault; The totem you retrieved earlier will guide you to the correct location. Place it in the tiny slot found behind the statue where you inserted the Star Jewels. Once aligned, the vault will open, revealing the treasure and completing the Tall Tale. Ensure the totem matches the cave paintings on the island for proper alignment and access to the reward.

Completing the Tall Tale
Return the Shroudbreaker to Sudds at The North Star Seapost to complete the quest. Claim your rewards, including the Shroudbreaker and Commendations for your achievements.
Returning the Shroudbreaker to Sudds
After solving the final vault puzzle, return to The North Star Seapost and interact with Sudds to hand over the Shroudbreaker. This completes the Tall Tale, granting you rewards, including the Shroudbreaker and Commendations for your achievements. Ensure all crew members are present to receive their rewards, marking the successful conclusion of your stargazing adventure.
Claiming Rewards
Upon completing the Tall Tale, return to Sudds to claim your rewards. You’ll receive the Shroudbreaker, a unique item tied to the quest, along with Commendations for your achievements. Additional rewards may include gold, Doubloons, and exclusive cosmetics. Ensure all crew members are present to collect their rewards, celebrating your successful navigation of the stars and puzzles. These rewards not only enhance your pirate’s reputation but also serve as a testament to your skill and dedication in unraveling the mysteries of the Stars of a Thief.
Earning Commendations and Achievements
Earning Commendations and Achievements requires completing specific tasks, such as decoding all riddles or solving the vault puzzle quickly. Each Commendation has unique criteria, rewarding players with exclusive cosmetics and Doubloons for their accomplishments.
Understanding Commendation Requirements
Commendations in Stars of a Thief are earned by completing specific tasks, such as decoding all riddles, finding both Star Jewels, or solving the vault puzzle quickly. Each Commendation has unique requirements, rewarding players with exclusive cosmetics, Doubloons, or reputation boosts. Some Commendations focus on speed, like completing the vault puzzle without drowning, while others require meticulous exploration or riddle-solving. Tracking your progress and understanding the criteria for each Commendation is key to unlocking all rewards and achieving 100% completion of the Tall Tale.
Strategies for Achieving All Commendations
To earn all Commendations in Stars of a Thief, focus on completing tasks efficiently and thoroughly. Prioritize time-sensitive objectives, like solving the vault puzzle quickly, to avoid drowning. Use the enchanted spyglass strategically to decode constellations and riddles accurately. Explore islands meticulously to uncover hidden items and ensure no step is missed. Teamwork is crucial for speedruns, while solo players should plan carefully to meet all criteria. By combining skill and attention to detail, you can unlock every Commendation and maximize your rewards.
Completing the Stars of a Thief Tall Tale is a rewarding experience, culminating in returning the Shroudbreaker to Sudds and claiming your well-deserved rewards. This guide ensures a smooth journey through constellations, riddles, and puzzles, helping you master the challenges and emerge victorious.
Recap of Key Steps
Begin by visiting The North Star Seapost and interacting with Sudds to initiate the quest. Use the Tale Book to guide your journey, decoding riddles and constellations. Equip the Enchanted Spyglass to reveal star symbols and directions, leading you to Star Jewels. Solve the vault puzzle by aligning symbols with constellations, then place the jewels in the statue to retrieve the totem. Finally, unlock the vault and return the Shroudbreaker to Sudds to complete the tale and claim your rewards.
Final Tips for Success
Use the Enchanted Spyglass thoroughly to decode star symbols and compass directions. Pay close attention to riddles and align symbols precisely with constellations. Practice patience when solving the vault puzzle, ensuring each block matches the poem clues. Double-check your alignments to avoid errors. Keep the Tale Book handy for quick references. Stay observant and methodical, especially when interpreting cryptic clues. With careful planning and attention to detail, you’ll master the Stars of a Thief Tall Tale and unlock its rewarding secrets.