Honeywell T6 Pro Installation Manual: A Comprehensive Guide
This manual offers a detailed, step-by-step approach to installing and utilizing your Honeywell T6 Pro thermostat. It covers everything from initial setup
to advanced features, ensuring a smooth and efficient experience.
The Honeywell T6 Pro represents a significant advancement in home climate control, offering a blend of smart technology and user-friendly operation. This programmable thermostat is designed to optimize energy efficiency, reduce utility costs, and enhance home comfort. It seamlessly integrates with various heating and cooling systems, providing precise temperature management tailored to your lifestyle.
Unlike traditional thermostats, the T6 Pro boasts a vibrant touchscreen display and intuitive interface, simplifying adjustments and schedule programming. Furthermore, its compatibility with the Honeywell Home app unlocks remote access and control via smartphones or tablets, allowing you to manage your home’s temperature from anywhere. The thermostat’s sleek design complements any décor, while its robust features cater to both basic and advanced user needs.
This installation manual will guide you through every stage of the setup process, from unboxing and wiring to Wi-Fi connectivity and personalized scheduling. Whether you’re a seasoned DIY enthusiast or a first-time installer, this guide provides clear, concise instructions to ensure a successful installation and optimal performance of your Honeywell T6 Pro thermostat.
Unboxing and Package Contents
Upon receiving your Honeywell T6 Pro thermostat, carefully inspect the packaging for any signs of damage during transit. Once confirmed secure, open the box and verify that all listed components are present. The standard package should include the T6 Pro thermostat unit itself, a mounting backplate designed for easy wall installation, and a comprehensive set of mounting screws and wall anchors to ensure a stable and secure fit.
Additionally, you’ll find a detailed installation guide – this very manual – providing step-by-step instructions. Wire labels are crucial for correct wiring, preventing errors during installation. Some packages may also include a screwdriver, though having your own precision screwdriver is recommended. Finally, a quick start guide offers a simplified overview for immediate setup.
If any components are missing or appear damaged, immediately contact Honeywell customer support. Do not attempt installation with incomplete or faulty parts. Retain the original packaging for potential returns or warranty claims. A complete inventory ensures a smooth and trouble-free installation process, maximizing the benefits of your new thermostat.
Safety Precautions
Prior to commencing the installation of your Honeywell T6 Pro thermostat, it is paramount to prioritize safety. Always disconnect power to your HVAC system at the breaker box before handling any wiring. Failure to do so could result in electrical shock, causing serious injury or even fatality. If you are uncomfortable working with electrical wiring, consult a qualified HVAC technician.
Exercise caution when drilling or screwing into walls, ensuring you avoid hidden pipes or electrical wires. Wear appropriate safety glasses to protect your eyes from debris. Keep small parts, such as screws, away from children and pets to prevent choking hazards. Do not install the thermostat in a location exposed to direct sunlight, extreme temperatures, or moisture, as this can affect its performance and lifespan.
This thermostat is designed for indoor use only. Adhere to all local electrical codes and regulations during installation. If you detect any damaged wiring or components, discontinue installation immediately and contact a professional. Your safety is our utmost concern; follow these precautions diligently.
Tools Required for Installation
To ensure a seamless Honeywell T6 Pro thermostat installation, gathering the necessary tools beforehand is crucial. A Phillips head screwdriver is essential for securing the backplate and thermostat to the wall, as well as for connecting the wiring. A flathead screwdriver may be needed for certain terminal screws. Wire strippers are vital for preparing the existing HVAC wiring for connection to the thermostat’s terminals, ensuring clean and secure connections.
A level will help guarantee the thermostat is mounted straight, providing an aesthetically pleasing and accurate installation. A drill with appropriate drill bits is required for creating mounting holes in the wall, if necessary. Pliers can assist with bending or manipulating wires. A voltage tester is highly recommended to verify that power is completely disconnected before working with any wiring.
Finally, a digital multimeter can be useful for troubleshooting potential wiring issues. Having a flashlight or headlamp will improve visibility in dimly lit areas. Consider a labeling system, like masking tape and a pen, to clearly mark wires during removal for easy re-connection.
System Compatibility Check
Before beginning the Honeywell T6 Pro installation, verifying your existing HVAC system’s compatibility is paramount. The T6 Pro generally supports most 24V heating and cooling systems, including furnaces, air conditioners, heat pumps, and boilers. However, it’s crucial to confirm compatibility with millivolt systems, as these require specific configurations.
Check if your system utilizes a common wire (C-wire). The T6 Pro functions optimally with a C-wire, providing continuous power. If a C-wire isn’t present, a C-wire adapter may be necessary, though compatibility isn’t guaranteed in all scenarios. Ensure your system doesn’t utilize proprietary communication protocols that are incompatible with the T6 Pro’s standard wiring.
Review your existing thermostat’s wiring configuration. The T6 Pro supports various wiring schemes, but understanding your current setup is vital for correct installation. If you have a multi-stage heating or cooling system, confirm the T6 Pro supports the number of stages present. If unsure, consult a qualified HVAC technician to avoid potential compatibility issues.
Wiring Diagram Overview
The Honeywell T6 Pro utilizes a standard color-coded wiring system for easy installation. Common terminal designations include Rh (heating power), Rc (cooling power), W (heating), Y (cooling), G (fan), and C (common). Understanding these designations is crucial for correct wiring.
A typical wiring diagram shows Rh and Rc connected to the thermostat’s Rh and Rc terminals, respectively. The W wire connects to the W terminal for heating activation, while the Y wire connects to the Y terminal for cooling. The G wire controls the fan operation, and the C wire provides continuous power. Heat pump systems may include additional terminals like O/B for reversing valve control.

Variations exist based on system type. For example, heat pump systems often require specific wiring configurations for auxiliary heat. Always refer to the detailed wiring diagram included with your T6 Pro thermostat and compare it to your existing wiring. Incorrect wiring can damage your HVAC system or the thermostat itself. If unsure, consult a qualified HVAC professional.
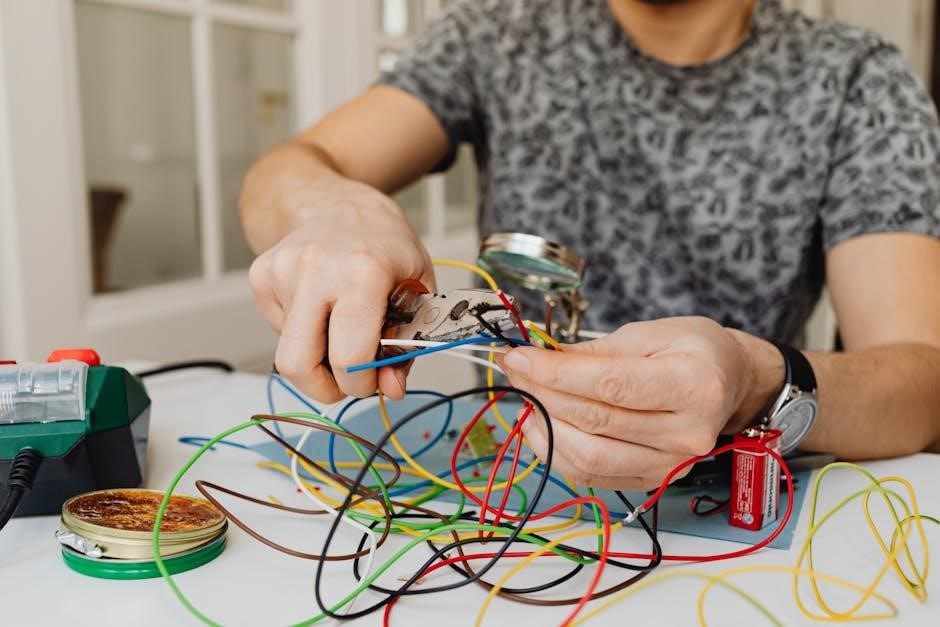
Identifying Your Existing Wiring
Before disconnecting any wires from your old thermostat, carefully document the existing wiring configuration. Use a smartphone to take clear, well-lit photographs of the wiring connections. Note the color of each wire and the terminal it’s connected to. This documentation will be invaluable during the installation of your Honeywell T6 Pro.
Common wire colors include red, white, green, yellow, and blue, but variations can occur. Don’t rely solely on color coding, as some installers may use non-standard wiring. Always verify the wire’s function by referencing the terminal designations on your old thermostat. Label each wire with a small piece of tape indicating its corresponding terminal (e.g., Rh, Rc, W, Y, G, C).
If you discover a wire connected to a terminal not listed on the T6 Pro’s wiring diagram, consult the manual or a qualified HVAC technician. Disconnecting wires without proper identification can lead to system malfunctions. Take your time and double-check your work to ensure accurate wiring during the installation process.
Mounting the Backplate
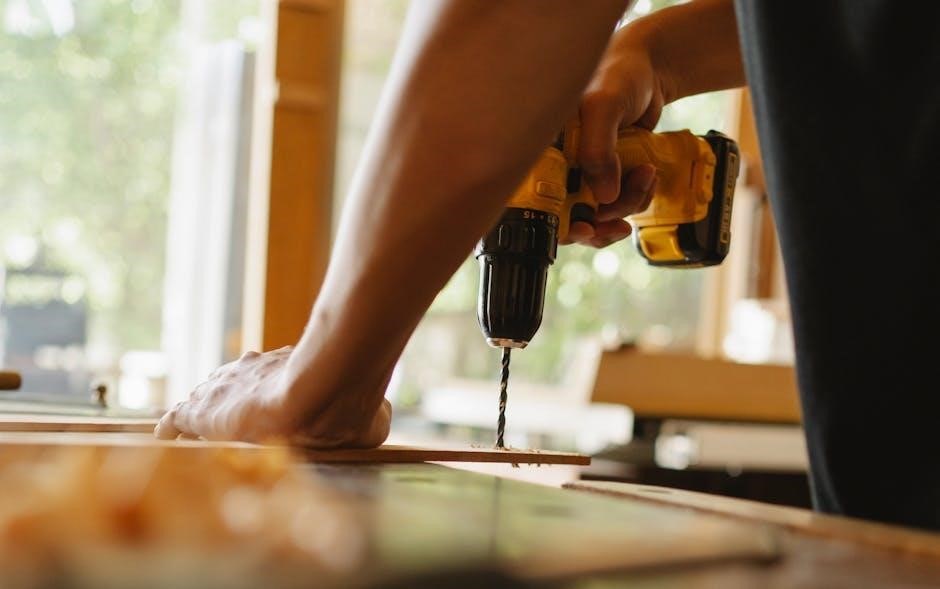
With your existing wiring identified and labeled, proceed to mount the Honeywell T6 Pro backplate to the wall. Ensure the power to your HVAC system is completely shut off at the breaker before handling any wiring. Use the included level to guarantee the backplate is perfectly horizontal; a level installation is crucial for proper thermostat operation and aesthetic appeal.
Position the backplate on the wall, aligning it with the existing screw holes if possible. If new holes are required, use the provided anchors and screws. Drill pilot holes first to prevent damage to the wall. Securely fasten the backplate to the wall, ensuring it’s firmly attached and doesn’t wobble.
Once the backplate is mounted, carefully feed the thermostat wires through the designated opening. Ensure sufficient wire length is available for easy connection to the terminals. Double-check that the backplate is securely mounted and level before proceeding to the next step – connecting the wires.
Connecting the Wires to the Backplate
Now, carefully connect the wires to the corresponding terminals on the Honeywell T6 Pro backplate. Refer to the wiring diagram you identified earlier and the labels you applied to each wire. Gently loosen the terminal screws before inserting each wire, ensuring a secure connection. Avoid stripping the wire insulation excessively, as this can lead to short circuits.
Match each wire color to its designated terminal – typically, Rh and Rc for power, W for heat, Y for cooling, and G for the fan. If you have a common wire (C), connect it to the ‘C’ terminal; this is often required for Wi-Fi connectivity and consistent power. Double-check each connection to ensure it’s firmly seated and the screw is tightened.
Once all wires are connected, gently tug on each one to verify its secure attachment. Ensure no bare wire is exposed outside the terminal. A secure and correct wiring configuration is vital for the proper functioning of your thermostat and HVAC system.
Attaching the Thermostat to the Backplate
With all wires securely connected to the backplate, carefully align the Honeywell T6 Pro thermostat with the mounted backplate. Gently push the thermostat onto the backplate, ensuring it clicks firmly into place. You should feel and hear a distinct click, indicating a secure connection. Do not force the thermostat; if it doesn’t align easily, double-check the wire connections and the backplate’s mounting.
Once attached, verify that the thermostat is flush against the wall and doesn’t wobble. A loose connection can cause intermittent operation or damage to the device. Inspect the wiring again through the thermostat’s opening to confirm no wires are pinched or dislodged during the attachment process.
This step completes the physical installation. Before powering on the system, take a moment to visually inspect everything one last time, ensuring all connections are secure and the thermostat is firmly mounted.
Powering On and Initial Setup
After securely attaching the thermostat to the backplate, restore power to your HVAC system at the circuit breaker. The Honeywell T6 Pro should power on automatically, displaying the welcome screen. If it doesn’t, recheck the breaker and ensure the thermostat is correctly seated on the backplate. Allow a few moments for the thermostat to boot up and initialize.
The initial setup will guide you through essential configurations. You’ll be prompted to select your system type (heating, cooling, or heat pump) and configure basic settings like language and display preferences. Follow the on-screen instructions carefully, as accurate selections are crucial for proper operation.
During setup, the thermostat may perform a system test to verify wiring and functionality. This process may briefly activate your heating or cooling system. Once the initial setup is complete, you’ll be ready to connect to Wi-Fi and register your thermostat for full access to smart features.
Connecting to Wi-Fi
To unlock the smart features of your Honeywell T6 Pro, connecting to Wi-Fi is essential; From the thermostat’s main menu, navigate to the settings section and select “Wi-Fi.” The thermostat will scan for available networks. Choose your home network from the list and enter your password when prompted, ensuring correct capitalization.

The thermostat will attempt to connect to your network. This process may take a few moments. A successful connection will be indicated by a Wi-Fi symbol appearing on the thermostat’s display. If the connection fails, double-check your password and ensure your router is functioning correctly. You may need to restart the thermostat and try again;
Once connected, the thermostat will automatically synchronize with the Honeywell Home cloud platform, enabling remote access and control via the Honeywell Home app. This allows you to manage your home’s temperature from anywhere with an internet connection, creating schedules and receiving alerts.
Registering Your Thermostat
Registering your Honeywell T6 Pro thermostat is a crucial step to fully utilize its features and access ongoing support. This process links your thermostat to your Honeywell Home account, enabling remote control, software updates, and personalized assistance. You can register directly through the Honeywell Home app or via the Honeywell Home website.
During registration, you’ll be prompted to create a Honeywell Home account, if you don’t already have one. You’ll need to provide a valid email address and create a secure password. The thermostat’s serial number, typically found on the back of the unit or on the original packaging, will also be required.
Completing registration unlocks access to advanced features like geofencing, learning capabilities, and detailed energy reports. It also ensures you receive important notifications about system updates and potential issues. Registration is free and highly recommended for optimal performance and peace of mind.
Setting the Date and Time
Accurate date and time settings are fundamental for proper thermostat operation and scheduling. The Honeywell T6 Pro allows you to configure these settings directly on the device or through the Honeywell Home app. Ensuring correct time ensures your programmed schedules execute as intended, optimizing comfort and energy savings.
On the thermostat itself, navigate to the settings menu using the touchscreen interface. Locate the “Date/Time” option and select it. You’ll then be able to manually adjust the month, day, year, hour, and minute. Confirm your selections to save the changes.
Alternatively, using the Honeywell Home app provides a more streamlined experience. Within the app, select your thermostat and navigate to the device settings. The app often automatically synchronizes with your mobile device’s time, simplifying the process. Verify the displayed date and time are correct, and adjust if necessary. Proper time synchronization is vital for remote access and scheduling features.
Programming Your First Schedule
Creating a schedule is key to maximizing the energy-saving benefits of your Honeywell T6 Pro; The thermostat supports multiple daily and weekly schedules, allowing for customized temperature settings based on your routine. Begin by accessing the “Schedule” option within the thermostat’s menu or the Honeywell Home app.
You’ll typically define “periods” – Wake, Leave, Return, and Sleep – and assign desired temperatures to each. For example, you might set a lower temperature for “Leave” when the house is unoccupied and a comfortable temperature for “Return” when you’re home. The app interface often provides a visual timeline for easy schedule creation.
Consider your daily habits when programming. Do you have different weekend routines? The T6 Pro allows for separate weekday and weekend schedules. Experiment with different temperature settings to find the optimal balance between comfort and energy efficiency. Remember to save your schedule after making changes. Consistent scheduling delivers significant long-term savings.
Understanding the Thermostat Interface
The Honeywell T6 Pro features a user-friendly interface designed for intuitive control. The main screen prominently displays the current room temperature and the setpoint temperature. Navigation is primarily achieved through the touchscreen or the Honeywell Home app. A central dial or arrow buttons allow for quick temperature adjustments.
Key icons indicate system mode – Heat, Cool, Auto, or Off. A fan icon controls fan operation (Auto or On). The menu button, typically represented by three horizontal lines, grants access to advanced settings, scheduling options, and device information. The Wi-Fi signal strength indicator confirms connectivity.
Swiping across the screen often reveals additional information, such as humidity levels or energy usage data. Familiarize yourself with the different icons and menu options to fully utilize the thermostat’s capabilities; The interface is designed for ease of use, but consulting the manual for specific functions is always recommended.

Using the Honeywell Home App
The Honeywell Home app extends the control of your T6 Pro thermostat beyond the physical device. After registering your thermostat, download the app from your app store and create an account. The app mirrors the thermostat’s interface, allowing remote temperature adjustments, schedule modifications, and system mode changes.
A key feature is geofencing, which automatically adjusts the temperature based on your location, saving energy when you’re away. The app also provides detailed energy usage reports, helping you identify potential savings. Notifications alert you to temperature fluctuations, system alerts, or low battery warnings.
You can create custom schedules tailored to your lifestyle, and manage multiple thermostats from a single app. Voice control integration with Amazon Alexa or Google Assistant offers hands-free operation. Regularly updating the app ensures access to the latest features and security enhancements. The app truly unlocks the full potential of your T6 Pro.
Remote Access and Control
One of the significant benefits of the Honeywell T6 Pro thermostat is its remote access and control capabilities. Once connected to Wi-Fi and registered with a Honeywell Home account, you gain command over your home’s climate from anywhere with an internet connection.
This functionality is primarily accessed through the Honeywell Home mobile app, available for iOS and Android devices; Through the app, you can adjust the temperature, switch between heating and cooling modes, and override programmed schedules. This is particularly useful for unexpected schedule changes or when returning to a home that has been unoccupied.
Remote access also allows for monitoring of your home’s temperature, ensuring comfort and preventing potential issues like frozen pipes. Integration with voice assistants like Amazon Alexa and Google Assistant further enhances control, enabling voice commands for temperature adjustments. Secure access protocols protect your system from unauthorized control, providing peace of mind.
Troubleshooting Common Issues
Despite a straightforward installation, occasional issues may arise with your Honeywell T6 Pro thermostat. A common problem is Wi-Fi connectivity; ensure your router is functioning correctly and the thermostat is within range. Restarting both the thermostat and router often resolves this. If the display is blank, check the power supply and wiring connections.
Incorrect temperature readings can often be solved by recalibrating the thermostat through the settings menu. If the system isn’t responding to commands, verify the wiring matches the correct configuration for your HVAC system. For heating/cooling not turning on, double-check the system’s power switch and breaker.
The Honeywell Home app provides diagnostic tools and troubleshooting guides. If issues persist, consult the comprehensive online support resources or contact Honeywell’s customer support for assistance. Remember to document any error messages displayed for quicker resolution. A simple reset can often resolve software glitches.
Resetting the Thermostat
Occasionally, a reset of your Honeywell T6 Pro thermostat may be necessary to resolve software glitches or restore factory settings. There are two primary reset options: a soft reset and a factory reset. A soft reset, akin to restarting a computer, simply cycles the power to the thermostat. This can be achieved by removing the thermostat from the baseplate for approximately 30 seconds, then reattaching it.
A factory reset, however, erases all personalized settings – schedules, Wi-Fi connections, and user preferences – returning the thermostat to its original out-of-the-box state. This is typically performed through the thermostat’s menu system, navigating to the ‘Settings’ then ‘Reset’ options.
Before performing a factory reset, note that you will need to re-register the thermostat and reconfigure all settings. This process is useful if you’re experiencing persistent issues or transferring the thermostat to a new location. Refer to the Honeywell Home app or online manual for detailed, step-by-step instructions specific to your model.
Advanced Features and Settings
The Honeywell T6 Pro extends beyond basic heating and cooling control, offering a suite of advanced features accessible through both the thermostat interface and the Honeywell Home app. Geofencing utilizes your smartphone’s location to automatically adjust the temperature when you leave or return home, optimizing energy usage. Smart Recovery learns your heating and cooling patterns to ensure your desired temperature is reached precisely when needed.
Further customization is available through detailed scheduling options, allowing for different temperature settings for each day of the week and multiple time periods. You can also configure fan settings, including continuous operation or circulation after heating/cooling cycles. The thermostat supports humidity control (with compatible systems) and offers alerts for extreme temperatures or system malfunctions.
Within the app, explore advanced reporting features to track energy consumption and identify potential savings. Integration with other smart home platforms, like Amazon Alexa or Google Assistant, enables voice control and seamless automation. Regularly reviewing these settings ensures optimal performance and personalized comfort.
Warranty Information and Support
Honeywell provides a limited warranty for the T6 Pro thermostat, typically covering defects in materials and workmanship for a period of one year from the date of purchase. This warranty does not cover damage resulting from improper installation, misuse, or unauthorized modifications. Proof of purchase is required for all warranty claims. Detailed warranty terms and conditions are available on the Honeywell Home website or within the product documentation.
For technical support, Honeywell offers a comprehensive range of resources. Their online support portal features FAQs, troubleshooting guides, and downloadable manuals. You can also contact Honeywell’s customer support team via phone or email, with contact information readily available on their website. Online forums and communities dedicated to Honeywell products can also provide valuable peer-to-peer assistance.
Should you encounter any issues not covered by the online resources, Honeywell’s support team is equipped to diagnose and resolve problems, potentially offering replacement options if the thermostat is deemed defective under warranty. Registering your thermostat online streamlines the support process.