This manual provides a comprehensive guide to installing, configuring, and maintaining the GE Burglar Alarm System. It covers system features, zone setup, and troubleshooting for optimal security.
Overview of GE Burglar Alarm System
The GE Burglar Alarm System is a reliable security solution designed to protect homes and properties. It features a user-friendly interface and advanced capabilities, including zone configuration and adjustable settings. The system supports up to 8 zones, ensuring comprehensive coverage. Key components include the NX-4 control panel, sensors, and expanders. It offers low battery indication, alarm delays, and integration with smart home systems. The system is easy to install and customize, providing peace of mind for homeowners. With its robust features and compatibility with home automation, the GE Burglar Alarm System is a versatile and efficient security option for various environments.
Purpose and Scope of the Manual
This manual serves as a detailed guide for installing, operating, and maintaining the GE Burglar Alarm System. It is designed to assist users in understanding system components, configuring settings, and troubleshooting common issues; The manual covers essential topics such as zone management, sensor installation, and advanced customization options. It also provides information on integrating the system with smart home devices and ensuring optimal performance. By following the guidelines outlined in this manual, users can maximize the effectiveness of their security system and ensure their property is protected. The manual is intended for both new and experienced users, offering clear instructions for every aspect of system operation.

Installation Guide
Mount the GE Burglar Alarm and sensors using the provided adhesive tape. Place units on moving and stationary parts of doors or windows for secure installation.
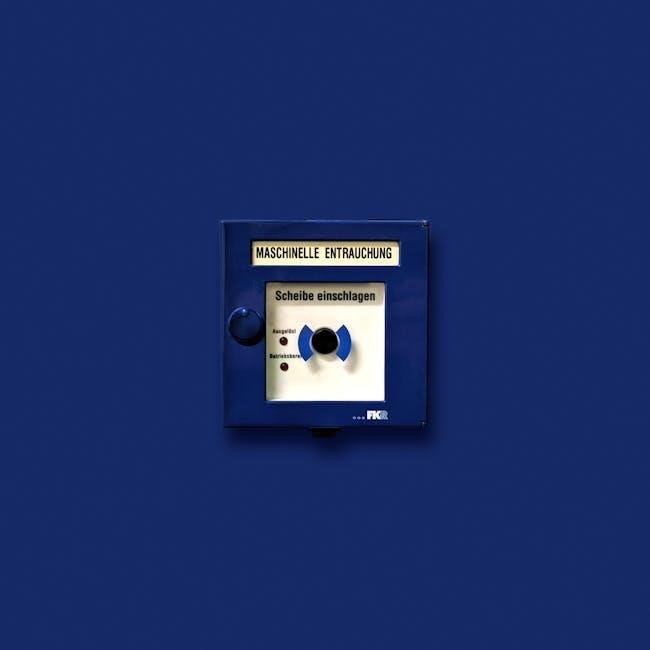
Preparing for Installation
Before installing the GE Burglar Alarm, assess your home’s entry points and determine optimal sensor locations. Ensure all surfaces are clean and dry for proper adhesion. Gather necessary tools, including the provided double-sided adhesive tape and a screwdriver. Verify compatibility with existing security systems and home automation devices. Plan the layout to maximize coverage and minimize interference. Test the alarm’s functionality before permanent installation to ensure proper operation. Review the manual for specific guidelines and manufacturer recommendations to avoid common installation errors. Proper preparation ensures a secure and reliable system setup.
Mounting the Alarm and Sensors
Mount the GE Burglar Alarm and sensors using the provided double-sided adhesive tape or screws for a secure installation. Place the alarm unit on the stationary part of the door or window frame, and the magnetic sensor on the moving part. Ensure surfaces are clean and dry for proper adhesion. Align the sensor and magnet to maintain a clear line of sight. Avoid mounting in direct sunlight or areas prone to moisture. For optimal performance, keep sensors within the recommended range of the control panel. Test the alignment by opening and closing the door or window to ensure the sensor triggers correctly. Securely fasten all components to prevent tampering or accidental dislodgment. Proper mounting ensures reliable detection and system functionality.
Connecting Sensors to the Control Panel
Connect sensors to the GE Burglar Alarm control panel by enrolling each device through the system’s programming menu. Ensure the control panel is in enrollment mode before pairing. For wireless sensors, follow the manufacturer’s instructions to sync them with the panel. Wired sensors should be connected according to the wiring diagram provided. Once enrolled, test each sensor to confirm proper communication with the control panel. If using expanders, ensure they are correctly configured to avoid “Expander Trouble” notifications; Proper connection ensures reliable detection and system functionality. Refer to the manual for specific enrollment procedures and troubleshooting tips to resolve any connectivity issues during setup.
Programming the System
Programming the GE Burglar Alarm System involves defining zones, setting alarm delays, and configuring sensor responses. Use the control panel to assign zones to specific sensors and set their sensitivity. Adjust the alarm delay timing in location 40 to customize how long the system waits before triggering an alarm. Ensure all settings align with your security needs. After programming, test the system to confirm proper functionality. Refer to the manual for detailed instructions on advanced features like zone doubling and custom responses. Proper programming ensures reliable performance and tailored security for your home. Always test the system after making changes to verify functionality.

System Features and Capabilities
The GE Burglar Alarm System offers adjustable settings, a 120dB alarm, and low battery alerts. It supports zone configuration and integrates with home automation systems seamlessly.
Zone Configuration and Management
The GE Burglar Alarm System allows for efficient zone configuration, enabling users to customize security settings for different areas of their property. With support for up to 8 zones, the system ensures comprehensive coverage. Zone doubling is a feature that enhances monitoring by pairing sensors, providing detailed alerts for specific locations. Users can assign unique responses to each zone, ensuring tailored security. The system also alerts when zones are not properly enrolled, ensuring reliability. This feature-rich configuration ensures optimal protection and flexibility, making it easy to adapt the system to various home layouts and security needs. Proper zone management is key to maximizing the system’s effectiveness.
The GE Burglar Alarm System offers adjustable settings to customize alarm responses. Users can program delay times, ensuring a grace period before alarms activate, which is especially useful for entering or exiting the premises. The system also features a 120dB alarm, providing a loud deterrent against intruders. Additionally, adjustable sensitivity settings allow for fine-tuning sensors to reduce false alarms. These customizable options ensure the system adapts to individual security needs, offering both convenience and reliability. By tailoring alarm settings, users can enhance their home’s protection while minimizing unnecessary alerts, ensuring peace of mind and effective security management. This flexibility makes the system suitable for various home environments and preferences. The GE Burglar Alarm System includes a low battery indication feature to ensure continuous protection. Sensors with low battery levels trigger alerts on the control panel or keypad, notifying users of the need for replacement. The system also features a built-in test button, allowing users to verify battery strength and sensor functionality. Regular testing is recommended to maintain reliability and prevent false alarms. This feature ensures that the alarm remains operational, providing consistent security for your home. By addressing low battery issues promptly, users can uphold the system’s effectiveness and enjoy uninterrupted peace of mind. This simple yet essential function is a key part of the system’s design. The GE Burglar Alarm System seamlessly integrates with home automation systems, enhancing security and convenience. Compatibility with platforms like Home Assistant allows users to control their alarm system alongside other smart devices. This integration enables features such as remote monitoring, automated arming/disarming, and custom alerts. Users can also program scenes that trigger alarms when suspicious activity is detected. Additionally, tablets can be used as dashboards for system control, providing an intuitive interface for managing security settings. This integration ensures a unified and efficient home security experience, making it easier to protect and monitor your property from anywhere. The system’s adaptability to smart home ecosystems adds value and flexibility for modern users. Troubleshooting the GE Burglar Alarm System involves addressing Expander Trouble, zone configuration errors, and communication issues. Regular checks and updates help resolve common system malfunctions effectively. The GE Burglar Alarm System may display “Expander Trouble” if no devices are enrolled. This occurs when the NX-4 control panel detects no connected sensors. To resolve this, ensure all devices are properly enrolled and connected to the system. If devices are enrolled but the issue persists, check for communication errors or low battery levels. Expander Trouble reports appear hourly, indicating device zero (0) as the source. Proper device enrollment ensures accurate zone configuration and reliable system performance. Always verify sensor connections and test the system after enrollment to confirm functionality. Refer to the manual for detailed enrollment procedures and troubleshooting steps. Zone Doubling in the GE Burglar Alarm System allows for expanded coverage by linking multiple sensors to a single zone. However, configuration issues may arise if zones are not set up correctly. The system supports a maximum of 8 zones, regardless of the number of devices added. Improper zone configuration can lead to reduced functionality or false alarms. To avoid issues, ensure each zone is programmed accurately and sensors are properly assigned. If Zone Doubling is enabled, verify that all linked devices are compatible and functioning correctly. Regular system checks and updates can help prevent configuration errors and ensure reliable performance. Always refer to the manual for detailed zone setup instructions. The GE Burglar Alarm System allows for adjustable alarm delay and timing settings to provide flexibility in securing your home. The delay feature enables a grace period for entering or exiting the premises before the alarm activates. This setting is programmed in location 40 of the control panel and can be customized to suit your needs. Proper configuration ensures the system responds appropriately to potential threats while minimizing false alarms. It is essential to test the delay settings after programming to confirm they function as intended. Refer to the manual for detailed instructions on adjusting these settings to optimize your home’s security and convenience. Communication issues in the GE Burglar Alarm System often arise when devices fail to enroll or the control panel loses connection with sensors. The NX-4 control panel may report “Expander Trouble” if no devices are enrolled, indicating a communication problem. To resolve this, ensure all sensors are properly connected and enrolled in the system. Check wiring for any damage or loose connections. Restart the control panel and test communication by triggering a sensor. If issues persist, refer to the troubleshooting section for advanced diagnostic steps. Regular system checks and updates can prevent such problems, ensuring reliable performance and home security. Always follow the manual’s guidelines for optimal results. Customize your GE Burglar Alarm System with programmable zones, adjustable delays, and tailored alarm sounds for enhanced security and personalized protection. Integrate with smart home systems seamlessly. Programming zones and sensors in the GE Burglar Alarm System allows for tailored security configurations. The NX-4 control panel supports up to 8 zones, enabling precise device assignment. Zone doubling can be activated to monitor two sensors in one zone, enhancing coverage. Sensors must be enrolled correctly to avoid Expander Trouble alerts, which occur when no devices are detected. Adjustable settings, such as alarm delays, can be programmed to location 40 for customized response times. Ensure all devices are properly enrolled and configured to maximize system reliability and functionality. This step ensures your security setup meets specific needs for optimal protection. Setting up alarm delays on the GE Burglar Alarm System allows for a grace period before the alarm triggers, preventing false alarms. The NX-4 control panel enables programming of delay times, stored in location 40, to suit your needs. This feature is particularly useful for systems with multiple zones, ensuring users can enter or exit without immediate activation. Delays can be adjusted to account for different scenarios, such as longer times for main entrances. Proper configuration ensures the system remains reliable while accommodating user preferences. Always test the delay settings after programming to confirm they function as intended, providing peace of mind and effective security. The GE Burglar Alarm System offers customizable alarm sounds and volume settings to enhance security and user experience. Users can adjust the alarm volume to ensure it is audible but not intrusive. The system features a 120dB alarm, providing a loud, attention-grabbing sound for deterrence. Additionally, users can select from various tones or chimes for different zones, allowing easy identification of triggered areas. Volume adjustments can be made via the control panel or compatible devices. Customizing these settings ensures the system meets individual preferences while maintaining effective security. This feature is particularly useful for homes with multiple zones or specific audio needs, ensuring clarity and responsiveness in emergency situations. Regularly inspect sensors, clean components, and ensure secure connections to maintain system reliability. Replace batteries as needed and update software for optimal performance and security. Performing regular system checks ensures the GE Burglar Alarm operates efficiently. Test all zones and sensors monthly to confirm functionality. Check for low battery warnings and replace batteries promptly. Verify that all devices are enrolled correctly in the control panel to avoid Expander Trouble notifications. Ensure the system’s software is up-to-date for enhanced security features. Inspect wiring and connections for any damage or wear. Test alarm delays and timing settings to ensure they meet your needs. Regular checks help prevent false alarms and maintain reliable protection for your home. Schedule these checks to keep your system in optimal condition. Regular battery maintenance is crucial for the GE Burglar Alarm System. Replace batteries promptly when the low battery indication alerts. Use high-quality, compatible batteries to ensure reliable performance. For wireless sensors, locate the battery compartment and replace the old batteries with new ones. After replacement, test each sensor to confirm proper functionality. Refer to the manual for specific battery types and replacement procedures. Proper maintenance prevents system failures and ensures continuous protection. Always check expiration dates when purchasing new batteries to avoid premature replacement. Keep spare batteries on hand to minimize downtime during replacements. This ensures your security system remains operational at all times. Regular software updates are essential to ensure your GE Burglar Alarm System operates at peak performance. Visit the manufacturer’s website or authorized portals to check for the latest firmware versions. Download and install updates following the provided instructions. Always back up your system settings before proceeding. Updates may include enhanced features, security patches, and compatibility improvements. Refer to the manual for detailed steps on updating the control panel and connected devices. Keep your system up-to-date to maintain reliability and protect against potential vulnerabilities. For assistance, consult the GE support website or contact customer service. Regular updates ensure your security system remains effective and secure. Always verify the authenticity of update sources to prevent unauthorized access. Stay informed about new releases to keep your system current and fully functional. The GE Burglar Alarm System seamlessly integrates with smart home platforms, enhancing security and convenience. Compatible with systems like Home Assistant, it offers advanced control and automation features. The GE Burglar Alarm System is fully compatible with Home Assistant, offering seamless integration for enhanced home security. Users can control and monitor their alarm system directly through the Home Assistant dashboard, enabling remote access and real-time notifications. This integration allows for advanced automation capabilities, such as triggering alarms based on specific events or syncing with other smart devices. The system’s compatibility ensures a unified and convenient home security experience, making it easier to manage and customize settings according to individual preferences. With Home Assistant, users can enjoy a more connected and secure living environment. Tablets can be effectively used to control and monitor the GE Burglar Alarm System, offering a modern and convenient alternative to traditional keypads. By installing a basic dashboard app, users can access system controls and receive real-time updates. When the system enters a pending alarm state, the tablet automatically switches to a keypad screen, ensuring quick response capabilities. This setup enhances accessibility and simplifies system management. Tablets also support integration with smart home systems, allowing for seamless control of multiple devices. With customizable dashboards, users can tailor their security experience to meet specific needs, making tablets a versatile and efficient tool for system control. Regular system checks ensure optimal performance. Proper sensor placement maximizes coverage and reliability. Keep software updated for enhanced security and functionality. Proper sensor placement is crucial for effective security. Install door and window sensors on moving parts, such as the door or window itself, and stationary frames. Ensure sensors are aligned for consistent contact. Place them at a height where tampering is difficult. For maximum coverage, position sensors in high-traffic areas and near potential entry points. Test sensor range to ensure reliable detection. Avoid placing sensors in direct sunlight or extreme temperatures, as this may affect performance. Regularly inspect sensors to ensure they are secure and functioning correctly. Proper placement enhances system reliability and provides comprehensive home protection. Regular system checks and maintenance are essential for reliable operation. Test sensors and alarms monthly to ensure proper function. Replace batteries promptly when low battery indicators appear. Update system software regularly to access new features and security patches. Ensure all devices are properly enrolled and configured to avoid Expander Trouble notifications. Check sensor alignment and placement to prevent false alarms. Inspect wiring and connections for damage or wear. Perform zone configuration reviews to ensure accurate detection. Address any communication issues promptly to maintain system responsiveness; By following these steps, you can ensure your GE Burglar Alarm System operates efficiently and provides consistent protection for your home.Adjustable Alarm Settings
Low Battery Indication and Testing
Integration with Home Automation Systems

Troubleshooting Common Issues
Expander Trouble and Device Enrollment
Zone Doubling and Configuration Problems
Alarm Delay and Timing Settings
Resolving Communication Issues
Advanced Settings and Customization
Programming Zones and Sensors
Setting Up Alarm Delays

Customizing Alarm Sounds and Volume

Maintenance and Upkeep
Regular System Checks
Battery Replacement and Maintenance

Updating System Software

Integration with Smart Home Systems
Compatibility with Home Assistant
Using Tablets for System Control

Best Practices for System Usage
Optimal Placement of Sensors
Ensuring System Reliability