Assembling the Bonavita crib is a straightforward process with the right tools and instructions. Using a Phillips head screwdriver and the included Allen wrench ensures proper assembly. Follow the manual carefully to build a safe and sturdy crib for your baby‚ with options to convert it into a toddler bed or daybed in the future.
Overview of the Bonavita Crib
The Bonavita crib is a high-quality‚ durable piece of furniture designed for safety and comfort. Made from natural woods‚ it offers a classic and timeless design. Its sturdy construction ensures long-lasting use‚ and its convertible feature allows it to grow with your child‚ adapting from a crib to a toddler bed‚ daybed‚ or even a full-size bed. The crib is designed with easy assembly in mind‚ making it a practical choice for parents. With clear instructions and essential tools like a Phillips head screwdriver and an Allen wrench‚ you can set it up efficiently. Its natural finish and robust build make it a reliable option for your baby’s nursery.
Importance of Proper Assembly
Proper assembly of the Bonavita crib is crucial for ensuring the safety and structural integrity of the furniture. A well-assembled crib provides a stable and secure environment for your baby‚ preventing potential hazards like wobbling or collapsing. Following the instructions carefully guarantees that all parts are correctly aligned and securely fastened. Improper assembly can lead to safety risks‚ such as loose joints or uneven surfaces‚ which may harm your child. Additionally‚ proper assembly ensures the crib’s longevity and maintains its ability to convert into a toddler bed‚ daybed‚ or full-size bed in the future. Taking the time to assemble it correctly is an investment in your baby’s safety and comfort.
Tools and Materials Needed
To assemble the Bonavita crib‚ you’ll need a Phillips head screwdriver and the Allen wrench provided in the hardware box. Avoid using power tools‚ as they may strip the screws. Ensure all components‚ such as bolts‚ screws‚ and brackets‚ are included in the packaging. Organize the hardware and parts before starting to save time and reduce confusion. Refer to the manual for a detailed list of required tools and materials. Properly gathering and preparing these items ensures a smooth and efficient assembly process‚ helping you build a safe and sturdy crib for your baby.

Preparation for Assembly
Preparation involves gathering tools like a Phillips screwdriver and Allen wrench‚ organizing crib parts‚ and preparing a clear workspace. The manual guides you through these steps.
Gathering Tools and Hardware
To begin‚ gather the necessary tools: a Phillips head screwdriver and the Allen wrench provided in the hardware box. Avoid using power tools‚ as they may damage the crib. Organize all hardware‚ such as bolts‚ screws‚ and brackets‚ to ensure none are misplaced. Refer to the manual for a complete list of required tools and parts. Lay out the components in a logical order to streamline the assembly process. Double-check that all items from the packaging are accounted for before starting. Proper preparation ensures a smooth and efficient assembly experience‚ reducing the risk of delays or missing pieces.
Organizing the Components
Start by sorting and categorizing all crib components according to their purpose. Reference the manual to identify each part‚ such as frame sections‚ mattress supports‚ and hardware. Group similar items together‚ like bolts and screws‚ to avoid confusion. Place smaller parts in separate containers to prevent loss. Lay out larger components‚ such as side panels and the crib frame‚ in a logical order based on the assembly sequence. Ensure the Allen wrench and Phillips head screwdriver are easily accessible. Organizing components beforehand saves time and reduces the risk of missing pieces during assembly. This step is crucial for a smooth and efficient process.
Preparing the Assembly Area
Clear a large‚ flat workspace to ensure a comfortable and efficient assembly process. Cover the floor or table with a soft cloth or mat to protect the crib components from scratches. Gather all tools‚ such as a Phillips head screwdriver and the included Allen wrench‚ and place them within easy reach. Keep small hardware‚ like bolts and screws‚ in a container to prevent loss. Ensure the area is well-lit to avoid mistakes. Avoid using power tools‚ as they may damage the crib’s finish. Having a tidy and organized workspace will make assembling the Bonavita crib much easier and less stressful.
Step-by-Step Assembly Guide
This guide provides a detailed‚ easy-to-follow process for assembling the Bonavita crib. Start by gathering tools like a Phillips head screwdriver and the included Allen wrench. Follow the manual’s clear instructions to build the crib frame‚ attach the mattress support‚ and install the sides and back panel. Each step is designed to ensure safety and stability‚ making the assembly process straightforward and stress-free. With careful attention to the instructions‚ you’ll have the crib ready for your baby in no time.
Assembling the Crib Frame
Begin by unpacking and organizing the crib frame components. Use the Phillips head screwdriver and Allen wrench to secure the frame’s sides and base. Align the pre-drilled holes carefully to ensure proper fitment. Tighten all bolts firmly but avoid over-tightening‚ which could damage the wood. The crib frame is constructed from durable‚ natural wood‚ ensuring stability and safety. Follow the manual’s diagrams to attach the headboard and footboard securely. Double-check that all joints are aligned correctly for a sturdy base. This step is crucial for the crib’s overall stability and safety‚ so take your time to ensure everything is assembled properly.
Attaching the Mattress Support
Begin by aligning the mattress support slats with the crib frame‚ ensuring they fit into the pre-drilled holes. Secure each slat using the provided screws and a Phillips head screwdriver. Tighten firmly but avoid over-tightening to prevent damage. Check that all slats are evenly spaced and tightly fitted for a stable base. Once attached‚ gently shake the mattress support to ensure stability. Adjust any height settings according to the manual for proper mattress fit and safety standards. This step is crucial for the crib’s safety and comfort‚ so attention to detail is essential.
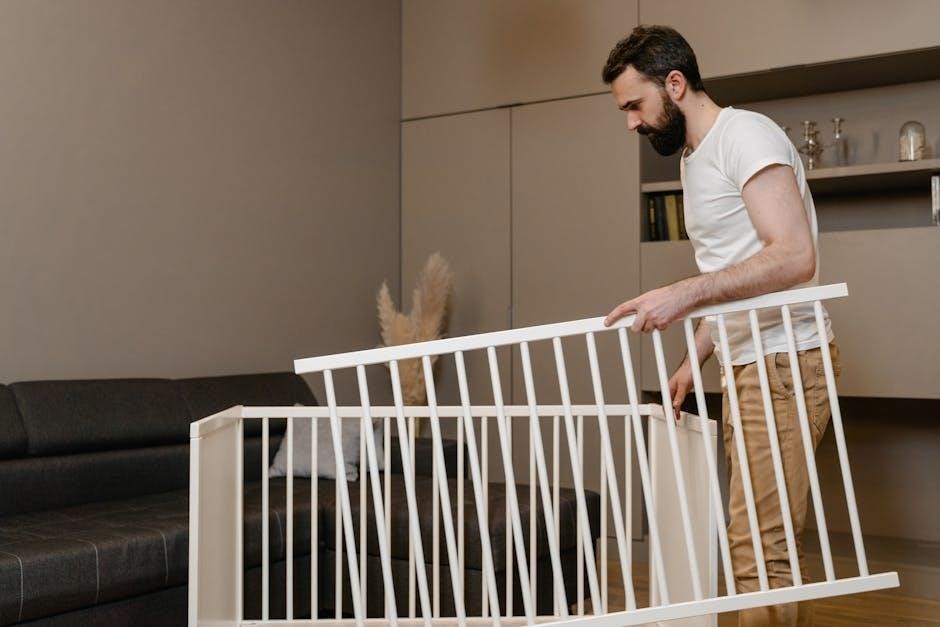
Installing the Crib Sides and Back Panel
Start by identifying the crib sides and back panel from the hardware. Align the side panels with the crib frame‚ ensuring they fit into the designated slots. Secure them using the bolts provided‚ tightening with the Allen wrench. Repeat the process for the back panel‚ ensuring it aligns perfectly with the sides. Once all panels are in place‚ use the Phillips head screwdriver to tighten the screws firmly. Double-check that all attachment points are secure and evenly aligned. Gently rock the panels to ensure stability and proper fit. This step ensures the crib’s structural integrity and safety for your baby.
Attaching the Front Rail and Hardware
Begin by aligning the front rail with the crib frame‚ ensuring it fits into the designated slots. Secure it using the provided bolts and tighten with the Allen wrench. Check for any additional hardware‚ like brackets‚ and attach them as instructed. Ensure proper alignment to maintain stability. Tighten all screws and bolts evenly to avoid uneven pressure. If the front rail has moving parts‚ assemble them carefully for smooth operation. Double-check the instructions to confirm all parts are included and properly secured. This step is crucial for the crib’s structural integrity and safety.
Final Assembly Checks
Verify all connections and hardware are secure. Gently rock the crib to ensure stability. Check for proper alignment and tighten any loose parts. Confirm mattress support is correctly positioned and secure.
Tightening All Bolts and Screws
Tightening all bolts and screws is crucial for ensuring the crib’s stability and safety. Use the provided Allen wrench and a Phillips head screwdriver to secure all connections firmly. Avoid using power tools‚ as they may strip the screws. Start by tightening the mattress support bolts‚ followed by the frame and side panels. Double-check all joints and hardware to ensure they are snug but not over-tightened‚ which could damage the wood. Refer to the manual for specific torque recommendations. Once complete‚ gently shake the crib to confirm it feels sturdy and even. Proper tightening ensures your baby’s safety and prevents any wobbling or instability.
Ensuring Stability and Safety
Ensuring the crib’s stability and safety is paramount for your baby’s well-being. After assembly‚ inspect all connections to confirm they are secure and properly aligned. Use the Allen wrench to double-check that all bolts and screws are tightened evenly. The crib should be level and free from wobbling. Place the mattress on the support and ensure it fits snugly without gaps. Avoid over-tightening‚ as this could damage the wood or compromise the crib’s structural integrity. Finally‚ test the crib by gently rocking it to ensure it remains stable. A safe and sturdy crib provides peace of mind for parents and a secure environment for your child.
Conversion Options
Bonavita cribs offer versatile conversion options‚ transitioning into toddler beds‚ daybeds‚ or full-size beds with ease. The process is straightforward with the right hardware and instructions.
Converting to a Toddler Bed
Converting your Bonavita crib to a toddler bed is a seamless process that extends its usability. Start by removing the crib sides and back panel‚ then attach the toddler bed rail. Ensure all bolts and screws are securely tightened for stability. Use the hardware provided in the conversion kit‚ following the step-by-step instructions in the manual. This transition maintains the crib’s original style while adapting to your child’s growing needs. Always double-check the alignment and safety of the bed before allowing your toddler to use it. Proper conversion ensures a smooth and safe transition to this new stage of your child’s development;
Converting to a Daybed
Converting your Bonavita crib to a daybed is a simple process that offers a comfortable sleeping option for older children. Begin by removing the front rail and attaching the daybed rail using the hardware provided in the conversion kit. Ensure the rail is properly aligned with the crib frame and securely fastened. Tighten all bolts and screws to maintain stability. The daybed conversion maintains the crib’s original style while providing a spacious and cozy bed for your child. Always verify the alignment and safety of the bed before use. This conversion is an excellent way to extend the life of your Bonavita crib‚ adapting it to your child’s evolving needs.
Converting to a Full-Size Bed
Converting your Bonavita crib to a full-size bed is a seamless process that extends its usability as your child grows. Begin by attaching the side rails from the conversion kit to the crib frame‚ ensuring proper alignment. Secure the rails using the provided hardware‚ following the manual’s instructions. Next‚ attach the bed frame support system to the side rails to create a sturdy base. Finally‚ place the full-size mattress on the frame and ensure all bolts and screws are tightly secured. This conversion transforms the crib into a comfortable and spacious bed‚ adapting to your child’s needs as they grow into adolescence.


Safety Verification
Ensure all parts are securely tightened and properly aligned. Check for any loose screws or bolts‚ and verify that the crib meets safety standards for stability and durability.
Checking for Loose Parts
Regularly inspect the crib for any loose screws‚ bolts‚ or hardware. Use the provided Allen wrench and Phillips head screwdriver to tighten any components that feel unstable. Pay particular attention to the mattress support‚ frame joints‚ and side panels‚ as these areas are critical for safety. Ensure all parts are securely fastened to prevent wobbling or structural weakness. Loose parts can compromise the crib’s stability‚ posing a risk to your baby’s safety. Refer to the manual for specific torque recommendations to avoid over-tightening‚ which could damage the wood or hardware. This step is essential for maintaining a secure and safe sleeping environment for your child.
Ensuring Proper Alignment
Proper alignment is crucial for the structural integrity and safety of the Bonavita crib. After assembling the frame‚ ensure all sides‚ back panels‚ and the mattress support are correctly aligned. Use the Allen wrench to adjust any misaligned parts‚ and verify that the crib’s sides are evenly spaced and level. Check that the front rail and hardware are securely attached and properly aligned with the frame. Refer to the manual for diagrams or visual guides to confirm alignment accuracy. Once assembled‚ gently rock the crib to ensure stability and make adjustments as needed. Proper alignment ensures the crib remains sturdy and safe for your baby.

Maintenance and Care
Regularly clean the Bonavita crib with a damp cloth‚ avoiding harsh chemicals. Inspect for wear and tear‚ ensuring all parts remain secure and functional over time.
Cleaning the Crib
Regular cleaning is essential to maintain the Bonavita crib’s condition. Use a soft‚ damp cloth to wipe down all surfaces‚ avoiding harsh chemicals that could damage the finish. For natural wood cribs‚ a gentle wood cleaner can be used if necessary. Dry the crib thoroughly after cleaning to prevent moisture damage. Inspect for any wear and tear‚ such as loose joints or scratches‚ and address them promptly. Cleaning not only keeps the crib hygienic but also ensures the safety and longevity of the furniture. Refer to the manual for specific care instructions tailored to your crib model.
Inspecting for Wear and Tear
Regularly inspect the Bonavita crib for wear and tear to ensure safety and durability. Check all joints‚ slats‚ and hardware for looseness or damage. Inspect the natural wood surfaces for scratches or cracks that may require touch-ups. Look for any signs of instability or misalignment‚ especially after conversions. Tighten any loose bolts or screws immediately. If you find damaged parts‚ replace them to maintain the crib’s structural integrity; Keep the crib manual handy for part numbers and replacement guidance. Addressing wear and tear promptly helps prevent larger issues and ensures the crib remains safe for your child.

Troubleshooting Common Issues
Common issues during Bonavita crib assembly include wobbly frames and misaligned panels. Refer to the manual for solutions‚ ensuring all bolts are tightened properly and parts are correctly aligned.
Addressing Wobbly Frames
A wobbly crib frame can be resolved by checking all bolts and screws for tightness. Ensure the mattress support is securely attached and properly aligned. If instability persists‚ verify that all hardware is correctly installed and tightened using the provided Allen wrench. Avoid overtightening‚ as this may damage the wood. If the issue remains‚ inspect the frame for any misaligned or loose joints. Refer to the Bonavita crib manual for specific guidance on frame assembly and stabilization. Ensuring a sturdy frame is crucial for your baby’s safety and comfort. Regularly inspect and tighten any loose parts to maintain stability over time;
Fixing Misaligned Panels
If the crib panels become misaligned during or after assembly‚ start by loosening the screws slightly to allow adjustment. Gently realign the panels to ensure proper fit and alignment with the frame. Use the Allen wrench to tighten the screws once the panels are correctly positioned. Avoid forcing the panels into place‚ as this may damage the wood or hardware. If misalignment persists‚ double-check the hardware for correct installation and refer to the Bonavita crib manual for specific guidance. Patience and careful adjustment are key to achieving a secure and even fit for all panels.
Assembling the Bonavita crib is a rewarding process that ensures your baby’s safety and comfort. By following the step-by-step instructions and using the right tools‚ you can complete the assembly efficiently. Remember to double-check all bolts and screws for tightness and verify the crib’s stability before use. Regular maintenance‚ such as inspecting for wear and tear‚ will extend the crib’s lifespan. If you encounter any issues‚ refer to the troubleshooting section for solutions. With proper care‚ the Bonavita crib will provide a secure and cozy space for your child to grow. Enjoy the satisfaction of creating a safe and beautiful nursery for your little one.