Carport installation offers a practical solution for vehicle protection, enhancing property value․ Whether DIY or professional, it provides durable shelter and style, ensuring long-term benefits for homeowners․
Benefits of Installing a Carport
Installing a carport provides excellent protection for vehicles from harsh weather conditions, extending their lifespan․ It adds value to your property and offers a cost-effective alternative to garages․ Carports are versatile, accommodating cars, RVs, and outdoor storage needs․ They enhance curb appeal and provide a durable, low-maintenance shelter solution․ Additionally, carports can serve as multipurpose spaces for entertaining or storage, making them a practical investment for homeowners․ Their ease of installation and customizable designs ensure they fit various lifestyles and budgets, offering long-term benefits for vehicle protection and property enhancement․
DIY vs․ Professional Installation
Deciding between DIY and professional carport installation depends on your skills and time․ DIY offers cost savings and a sense of accomplishment but requires tools and effort․ Professionals provide expertise, ensuring a quick and flawless setup․ For complex designs or large carports, hiring a pro is advisable․ DIY kits are user-friendly, but mistakes can lead to structural issues․ Weigh your confidence and resources to choose the best approach for a successful carport installation, ensuring durability and safety while staying within budget and meeting local building codes․
Tools and Materials Needed
Essential tools for carport installation include a drill, wrench, screwdriver, ladder, and measuring tape․ Materials like screws, bolts, anchors, and roofing panels are typically provided in DIY kits․ Ensure all parts are included and undamaged․ Additional items such as concrete for the foundation and waterproofing materials may be required․ Safety gear like gloves and safety glasses is crucial․ Refer to the manufacturer’s manual for specific tools and materials needed for your carport model․ Proper preparation ensures a smooth installation process and a durable structure․ Always check local hardware stores for any extra supplies not included in the kit․

Planning and Preparation
Planning and preparation are crucial for a successful carport installation․ Evaluate your needs, measure the space, and ensure compliance with local building codes and regulations․
Assessing the Installation Site
Assessing the installation site is the first critical step in carport installation․ Ensure the area is level, well-drained, and free from obstructions․ Check for any underground utilities or power lines․ Measure the space to confirm it fits your carport dimensions․ Evaluate the ground conditions to determine if additional foundation work is needed․ Verify local building codes and regulations․ Ensure proper drainage to prevent water accumulation․ Identify the best orientation for sunlight and wind protection․ A thorough site assessment ensures a smooth installation process and prevents potential issues down the line․
Choosing the Right Carport Kit
Selecting the right carport kit is essential for a successful installation․ Consider the size, material, and style to match your needs and property․ Metal carport kits are popular for their durability and cost-effectiveness․ Choose between single or multi-vehicle options based on your requirements․ Ensure the kit includes all necessary components, such as frames, roof panels, and hardware․ Check for rust-resistant coatings and weatherproofing features․ Compare prices and warranties to find the best value․ Consider DIY-friendly designs with clear instructions and customer support․ Ensure the kit complies with local building codes and regulations for a hassle-free installation experience․
Obtaining Necessary Permits
Before starting your carport installation, ensure you obtain all required permits․ Check local building codes, zoning laws, and regulations․ Submit detailed plans, including dimensions and materials, for approval․ Some areas may require inspections or additional permits for electrical or plumbing work․ Failure to secure permits can result in fines or project halts․ Research your local government’s requirements to avoid delays․ Display the permit prominently once approved․ This step ensures compliance and avoids legal issues, making your carport installation process smooth and stress-free․ Always verify permit requirements early in your planning phase to stay on track․
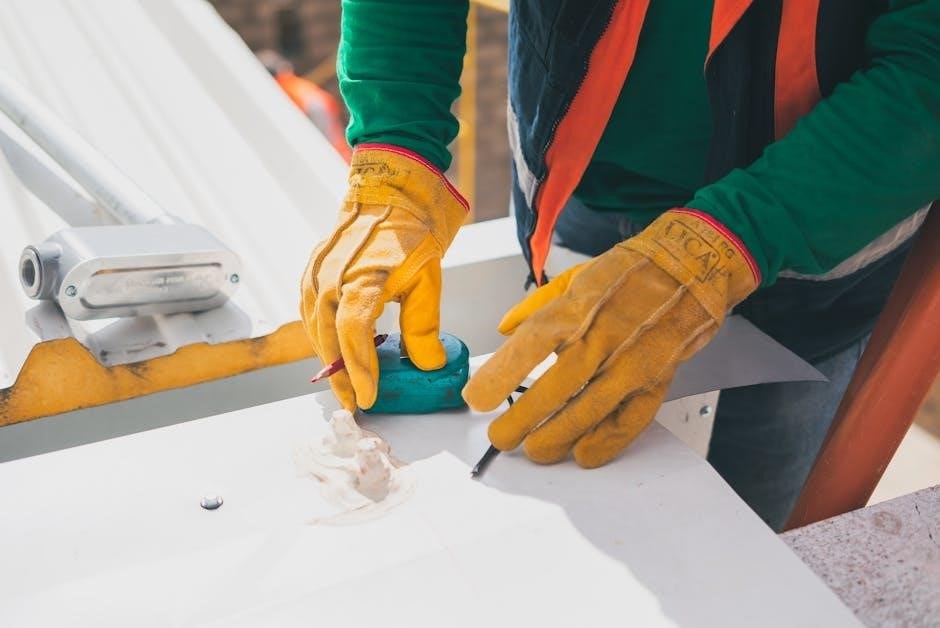
Preparing the Tools and Equipment
Gather all necessary tools and equipment before starting your carport installation․ Essential items include a wrench, screwdrivers, a drill, measuring tape, level, and safety gear like gloves and goggles․ Ensure you have a ladder or step stool for elevated tasks․ Organize the tools in a accessible location to streamline the process․ Check that all equipment is in good working condition and properly calibrated․ Additionally, prepare materials like concrete mix, anchors, and fasteners as specified in your carport kit․ Having everything ready will save time and reduce delays during installation․ Proper preparation ensures a smooth and efficient process from start to finish․

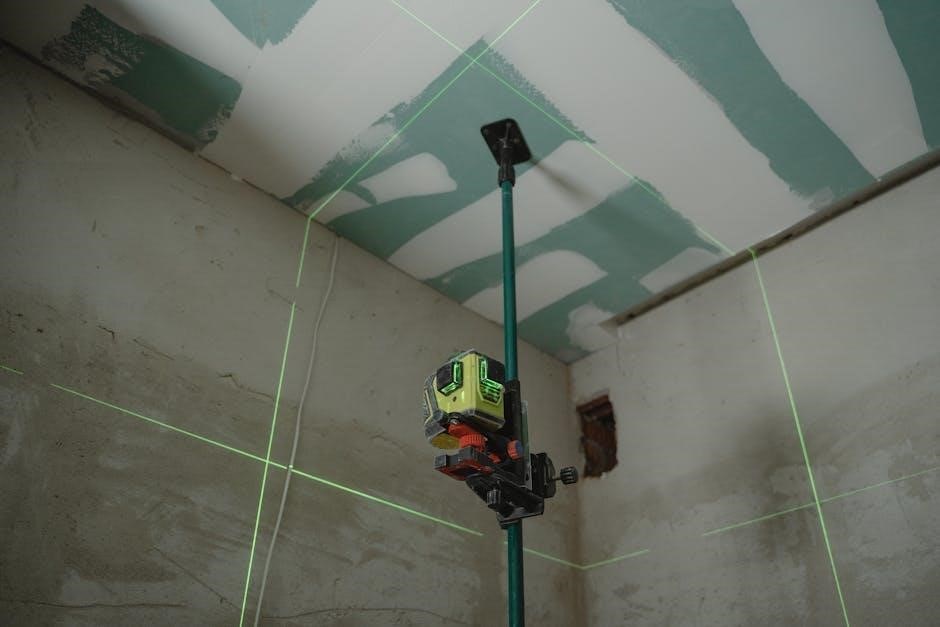
Site Preparation
Clear the area of debris, level the ground, and mark the installation site․ Ensure the surface is even and secure for the carport foundation and structure․
Clearing the Area
Before starting, thoroughly clear the installation site of debris, vegetation, and obstructions․ Remove any trees, rocks, or uneven terrain to ensure a smooth and even surface․ This step is crucial for proper leveling and foundation laying․ Use tools like shovels, rakes, and saws to remove obstacles․ Ensure the area is free from power lines or underground utilities․ A clean and obstacle-free space ensures safe and efficient installation․ Proper site preparation prevents future structural issues and guarantees a stable base for your carport․
Leveling the Ground
Leveling the ground is essential for a stable carport foundation․ Start by marking the installation area with stakes and string․ Use a shovel to remove high spots and fill low areas with compacted soil․ Check the surface with a spirit level or laser level to ensure evenness․ Repeat the process until the ground is perfectly level․ Compact the soil using a hand tamper or plate compactor to prevent settling․ Proper leveling ensures the carport stands straight and prevents water from pooling․ A well-leveled base is critical for the structural integrity and longevity of your carport․
Laying the Foundation
Laying the foundation is a critical step in carport installation․ Begin by assessing the site and choosing the appropriate foundation type, such as concrete footings or a gravel base․ Mark the area and dig holes for footings if required․ Pour concrete into the holes and let it set․ For a gravel base, spread and compact the material evenly․ Ensure the surface is level and drains properly․ Secure the carport’s base rails or frame to the foundation using anchor kits․ A sturdy foundation ensures stability and prevents shifting over time, protecting your investment and ensuring safety․ Proper preparation is key to a successful installation․
Assembling the Carport Structure
Assembling the carport structure involves unpacking and organizing parts, then constructing the frame․ Attach roof panels securely, ensuring a sturdy and weather-tight design for long-lasting protection;
Unpacking and Organizing Parts
Begin by carefully unpacking all components from the carport kit․ Organize parts by type, such as frames, panels, and hardware, to ensure easy access during assembly․ Check for completeness and inspect for damage․ Use the provided inventory list to verify each item․ Label and group similar parts together to streamline the process․ This step is crucial for efficient assembly and minimizing delays․ Proper organization ensures that all pieces are accounted for and readily available when needed, making the installation smoother and less stressful․

Assembling the Frame
Start by assembling the base rails, ensuring they form a square or rectangular shape depending on your carport design․ Attach the upright posts to the base, securing them with bolts․ Next, connect the roof beams to the top of the uprights, creating the frame’s skeleton․ Use a level to ensure all components are straight and plumb․ Follow the manufacturer’s instructions for tightening bolts and screws․ Double-check the frame’s alignment and stability before proceeding․ A well-assembled frame is crucial for the carport’s structural integrity and will serve as the foundation for attaching roof panels and other components․
Attaching Roof Panels
Begin by carefully placing the roof panels onto the frame, ensuring they align with the rafters․ Secure each panel using the provided screws or bolts, starting from the center and working outward to prevent buckling․ Tighten all fasteners firmly but avoid overtightening, which could damage the panels․ Check that each panel is evenly spaced and properly seated․ Once all panels are in place, inspect the roof for any gaps or misalignments․ Finally, apply a waterproof sealant around the edges and seams to ensure the roof is watertight and durable․ This step is crucial for the carport’s weather resistance and longevity․

Installing Walls and Doors
Install walls and doors by securing them to the frame with screws or bolts․ Ensure proper alignment and tighten firmly․ Apply weatherproofing sealant around edges for durability․
Adding Side Walls
Begin by measuring and marking the wall positions on the carport frame․ Attach side wall panels using the provided hardware, ensuring proper alignment․ Secure each panel tightly with screws or bolts․ For metal carports, pre-drilled holes simplify the process․ Check that walls are level and plumb before final tightening․ Seal any gaps between panels and the frame with weatherproofing sealant․ Optional windows or vents can be added for ventilation․ Ensure all sides are evenly spaced and securely fastened to withstand wind and weather conditions․ Properly installed side walls enhance protection and structural integrity․
Installing Doors and Openings
Begin by measuring the door opening according to the carport kit specifications․ Assemble the door frame using pre-drilled holes and provided hardware․ Attach hinges to the door and frame, ensuring proper alignment․ Secure the door to the carport structure with screws or bolts․ Install any additional hardware, such as latches or handles, for functionality․ Check that the door opens and closes smoothly․ For larger openings, consider adding support beams for stability․ Seal gaps around the door frame with weatherproofing materials to prevent water intrusion․ Ensure all doors are level and securely fastened to maintain structural integrity and protection from the elements․
Securing the Carport
Anchor the carport firmly to the ground using durable hardware like wedge anchors or concrete screws․ Ensure stability by tightening all bolts and checking for levelness regularly․
Anchoring the Carport to the Ground
Anchoring your carport to the ground is crucial for stability and safety․ Use high-quality anchors like wedge anchors or concrete screws to secure the structure․ Ensure the ground is level and firm before drilling․ Follow the manufacturer’s instructions for anchor placement and tightening․ Proper anchoring prevents the carport from shifting or toppling during strong winds or storms․ Regularly inspect the anchors to ensure they remain tight and secure․ This step is essential for protecting your investment and ensuring the carport withstands various weather conditions effectively․
Ensuring Stability and Safety
Ensuring the stability and safety of your carport is vital for long-term durability and protection․ Regularly inspect the structure for loose bolts or damage, tightening as needed․ Check roof panels and frames for proper alignment and securement․ Use high-quality materials and follow installation guidelines to withstand harsh weather conditions․ Ensure proper drainage to prevent water pooling, which can weaken the structure․ Regular maintenance, such as cleaning debris and inspecting anchors, is essential․ A stable and safe carport protects your vehicles and enhances your property’s value, providing peace of mind for years to come․
Finishing Touches
Finishing touches involve waterproofing the roof, adding gutters, and conducting a final inspection to ensure everything is secure and functions properly, enhancing durability and aesthetics․
Waterproofing the Roof
Waterproofing the roof is essential to protect your carport from leaks and damage․ Apply a high-quality waterproofing sealant to all seams and edges․ Ensure the surface is clean and dry before application․ Use a brush or roller for even coverage․ For metal roofs, consider applying a rust-resistant coating․ Regular inspections and touch-ups will maintain the roof’s integrity․ Proper waterproofing extends the lifespan of your carport and ensures it remains a reliable shelter for your vehicles․ This step is crucial for both DIY and professionally installed carports, safeguarding against weather-related wear and tear․
Adding Gutters and Downspouts
Installing gutters and downspouts is a crucial step to direct water away from your carport․ Measure and cut gutters to fit the roof’s edges, securing them with brackets․ Attach downspouts to the gutters and extend them away from the structure․ Ensure proper alignment for smooth water flow․ Use sealant to prevent leaks at connections․ This system protects the carport’s foundation from erosion and reduces maintenance needs․ While optional, gutters and downspouts are a wise addition for long-term durability and functionality, enhancing your carport’s performance in rainy conditions․
Final Inspection and Adjustments
After completing the installation, conduct a thorough inspection to ensure everything is secure and properly aligned․ Check the frame, roof panels, and gutters for tightness and proper installation․ Verify that all bolts and screws are tightened, and the structure is level․ Inspect doors and openings for smooth operation and ensure all safety measures are in place․ Make any necessary adjustments to ensure stability and functionality․ This final step ensures your carport is safe, durable, and ready for use․ Proper inspection and adjustments guarantee a professional finish and prevent future issues, providing peace of mind for years to come․

Cost Considerations

Carport installation costs vary based on materials, size, and labor․ DIY kits save money, while professional services add labor fees․ Budgeting wisely ensures affordability and value․
Estimating Total Costs
Estimating carport installation costs involves considering materials, size, and labor․ DIY kits range from $1,500 to $6,000, while professional installations can cost $3,000 to $15,000․ Factors like roof style, siding, and foundation depth impact expenses․ Metal carports are generally more affordable than wood, with prices starting at $1,000 for basic models․ Location and local labor rates also influence total costs․ Comparing suppliers and contractors helps find the best value․ Additionally, permits and site preparation fees should be included in your budget for an accurate estimate․ Planning ahead ensures financial preparedness for your carport project․
Comparing DIY and Professional Costs
DIY carport kits typically cost between $1,500 and $6,000, depending on size and materials․ Professional installations range from $3,000 to $15,000, including labor and advanced features․ DIY options save on labor but require time and effort․ Professional services offer expertise and warranties but at a higher cost․ Factors like roof style, siding, and foundation depth also influence pricing․ Metal carports are generally cheaper than wood, with DIY metal kits starting at $1,000․ Location and labor rates affect professional costs․ Comparing both options helps determine the best fit for your budget and skill level, ensuring a cost-effective solution for your carport needs․
Maintenance and Upkeep
Regular cleaning, inspections, and repairs ensure longevity․ Remove debris, check for damage, and address issues promptly to prevent deterioration․ Apply protective coatings and inspect seasonal wear․
Regular Cleaning and Inspection
Regular cleaning and inspection are crucial for maintaining your carport’s durability․ Start by removing debris like leaves and dirt from the roof and gutters to ensure proper water flow․ Use a soft brush or hose to clean surfaces, avoiding harsh chemicals that might damage materials․ Inspect for rust, dents, or loose fasteners and address them promptly․ Check the foundation for stability and ensure all anchors are secure․ Regular maintenance prevents minor issues from becoming major repairs, ensuring your carport remains safe and functional for years to come․ Schedule inspections seasonally to catch potential problems early․
Repairing Damages
Repairing damages to your carport is essential to maintain its structural integrity and protect your vehicles․ Start by identifying the source of the damage, such as rust, dents, or loose panels․ For metal carports, treat rust with a wire brush and apply a rust-inhibiting coating․ Replace any severely damaged panels to prevent further deterioration․ Tighten loose screws or bolts and ensure all connections are secure․ If the damage is extensive, consider consulting a professional to avoid safety risks․ Regular inspections can help catch issues early, preventing costly repairs․ Addressing damages promptly ensures your carport remains sturdy and reliable for years to come․