This guide provides comprehensive troubleshooting solutions for Craftsman 1/2 HP garage door openers, addressing common issues like reversing doors, remote malfunctions, and motor problems. Regular maintenance ensures reliability and safety, helping homeowners resolve issues quickly and effectively.
Overview of the Craftsman 1/2 HP Garage Door Opener
The Craftsman 1/2 HP garage door opener is a reliable and durable model, designed for smooth and quiet operation. It features a robust motor, remote control functionality, and safety sensors to ensure secure and efficient garage door operation. Known for its longevity, this opener is suitable for various garage setups. However, like any mechanical device, it can experience issues such as reversing doors or motor malfunctions. Troubleshooting this model often involves checking sensor alignment, adjusting force settings, and ensuring proper lubrication of moving parts. Regular maintenance can prevent many common problems, ensuring years of dependable service and optimal performance.
Importance of Regular Maintenance and Troubleshooting
Regular maintenance and timely troubleshooting are crucial for ensuring the optimal performance and longevity of your Craftsman 1/2 HP garage door opener. By addressing issues early, you can prevent minor problems from escalating into costly repairs. Proper lubrication of moving parts, cleaning safety sensors, and tightening hardware help maintain smooth operation. Troubleshooting common issues like reversing doors or remote malfunctions not only saves time and money but also enhances safety. A well-maintained opener ensures reliable functionality, providing peace of mind and protecting your property from potential security risks associated with a malfunctioning garage door system.

Common Issues with the Craftsman 1/2 HP Garage Door Opener
The Craftsman 1/2 HP garage door opener often experiences issues like reversing before closing, failure to close properly, remote control malfunctions, motor unresponsiveness, and excessive operational noise.
Garage Door Reversing Before Closing Completely
The garage door reversing before closing completely is a common issue with the Craftsman 1/2 HP opener. This problem often occurs due to misaligned safety sensors or incorrect force settings. When the sensors detect an obstruction, the door reverses as a safety measure. To address this, ensure the sensors are clean, properly aligned, and free from interference. Adjusting the force settings according to the manufacturer’s instructions can also resolve the issue. Additionally, inspect the door tracks for obstructions or misalignment, as these can trigger the reversal mechanism. Addressing these areas should restore proper door operation.
Garage Door Not Closing Properly
A garage door that fails to close properly can be frustrating and compromise security. This issue often arises from obstructions in the door tracks or misaligned sensors. Check for debris or objects blocking the path and ensure the tracks are clean and clear. Lubricating the hinges and rollers can also improve movement. Additionally, inspect the limit switches, as improper settings may prevent the door from closing fully. Adjusting these switches according to the manufacturer’s instructions can resolve the problem. Addressing these factors ensures smooth and reliable door operation.
Remote Control Not Working
If your Craftsman 1/2 HP garage door opener remote isn’t functioning, start by replacing the batteries with a fresh set. Ensure the remote is properly programmed according to the manufacturer’s instructions. Check for interference from other devices, as nearby electronics can disrupt the signal. If issues persist, reprogram the remote by pressing the learn button on the opener and synchronizing the remote. Test the remote after each step to confirm functionality. If the problem remains unresolved, consider replacing the remote or consulting a professional for further assistance.
Motor Not Responding
If the motor of your Craftsman 1/2 HP garage door opener isn’t responding, first ensure it has power by checking the circuit breaker or fuse. Verify that the opener is properly plugged in and the outlet is functioning. Inspect the motor for signs of overheating, which can cause it to stop working. Check for worn or damaged components, such as the capacitor, which may need replacement. If the motor still doesn’t respond, consult the user manual or contact a professional to diagnose and repair any internal faults or electrical issues.
Excessive Noise During Operation
Excessive noise from your Craftsman 1/2 HP garage door opener can be caused by worn or loose components. Regular lubrication of the chain, belt, or screw drive is essential to reduce friction and quiet operation. Avoid using grease, as it attracts dust and debris. Tighten any loose bolts or screws on the opener and its mounting brackets. If noise persists, inspect for worn-out parts like rollers or gears, which may need replacement. Addressing these issues early prevents further damage and ensures smoother, quieter performance.

Essential Tools and Safety Precautions
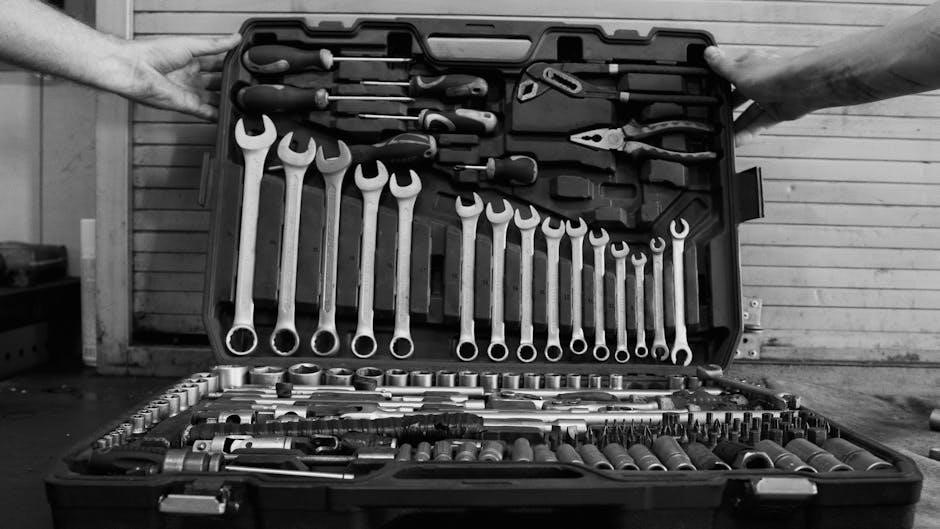
For troubleshooting, gather tools like a wrench, screwdriver, and lubricant. Always disconnect power before repairs. Wear safety gloves and ensure the door is secure. Avoid risks by following manual guidelines and using safety wires for springs. Proper precautions ensure safe and effective troubleshooting of your Craftsman garage door opener.
Tools Needed for Troubleshooting
Essential tools for troubleshooting include an adjustable wrench, screwdriver set, pliers, and lubricant. A multimeter can help check electrical connections. Safety gear like gloves and goggles is crucial. Ensure you have replacement parts like sensors, capacitors, or gears on hand. Proper tools enable effective diagnosis and repair of issues like misaligned sensors or worn-out components. Always refer to the user manual for specific tool recommendations. Having the right tools prepared saves time and ensures safe, efficient troubleshooting of your Craftsman garage door opener.
Safety Tips When Working with Garage Door Openers
Always disconnect power before starting repairs. Wear protective gear like gloves and safety glasses. Never stand under a moving garage door. Ensure the door is securely locked or supported when working. Keep children and pets away. Be cautious of springs, as they can be dangerous. Follow manufacturer guidelines and unplug the opener to prevent accidental activation. Proper safety measures protect you from potential hazards during troubleshooting and maintenance of your Craftsman garage door opener.
Troubleshooting the Garage Door Reversing Issue
Troubleshooting the reversing issue involves checking sensor alignment, adjusting force settings, and ensuring the door is properly balanced for smooth operation.
Checking and Aligning the Safety Sensors
The safety sensors are crucial for preventing accidents. Start by ensuring both sensors are clean and free from debris. Use a soft cloth to wipe the lenses. Next, check the alignment of the sensors; they must be properly aligned and facing each other. If the green lights on the sensors are not steady, realign them by gently adjusting their positions. Verify all connections to the motor unit are secure. If issues persist, consult the manual for detailed alignment instructions. Properly aligned sensors ensure the door operates safely and efficiently.
Adjusting the Force Settings
Adjusting the force settings on your Craftsman 1/2 HP garage door opener is essential for proper operation. Locate the force adjustment knobs or screws on the motor unit, typically labeled “open” and “close” force. Refer to your manual for specific instructions. Turn the knobs clockwise to increase the closing force or counterclockwise to decrease it. After adjusting, test the door to ensure it closes smoothly without reversing. If the door still malfunctions, further fine-tuning may be needed. Proper force settings prevent damage and ensure safe, reliable operation.
Inspecting the Door Tracks and Rollers
Inspecting the door tracks and rollers is crucial for smooth operation. Clean the tracks of dirt, debris, or grease, as obstructions can cause reversing or improper closing. Check for bent or misaligned tracks and straighten them if necessary. Lubricate the rollers with a garage door lubricant to reduce friction and noise. Tighten any loose bolts or screws on the tracks and roller brackets. If rollers are worn or damaged, replace them to ensure proper movement. Regular inspection and maintenance of these components prevent issues and extend the opener’s lifespan. Always ensure the tracks are properly aligned for optimal performance.

Resolving the Garage Door Not Closing Problem
Check for obstructions in the door tracks, ensure proper alignment, and lubricate hinges and rollers. Adjust limit switches to ensure the door closes fully and securely.
Checking the Door Tracks for Obstructions
Ensure the garage door tracks are clear of debris, dirt, or obstructions that may block the door’s path. Inspect both vertical and horizontal tracks for alignment issues or damage. Use a wrench to tighten any loose bolts securing the tracks to the wall or ceiling. If tracks are misaligned, adjust them carefully to ensure proper door movement. Clean the tracks with a soft brush or cloth to remove dust and grime. Lubricate the tracks lightly with a silicone-based spray to reduce friction and ensure smooth operation. Always disconnect power before performing any adjustments for safety.
Lubricating the Door Hinges and Rollers
Lubricating the door hinges and rollers is essential for smooth operation and reducing noise. Use a silicone-based spray lubricant, avoiding grease, which attracts dust. Spray the hinges where the door panels meet and the rollers that run along the tracks. Wipe off excess lubricant with a clean cloth to prevent dirt buildup. Regular lubrication prevents wear and tear, ensuring the door moves effortlessly. This step is crucial for maintaining the opener’s performance and extending its lifespan. Always test the door after lubrication to ensure proper function.
Adjusting the Limit Switches
Adjusting the limit switches ensures the garage door stops correctly when opening or closing. Locate the switches on the opener’s rail, typically near the motor unit. Turn the adjustment screws clockwise or counterclockwise to increase or decrease the stop positions. Test the door after each adjustment to ensure it stops evenly. Properly set limit switches prevent the door from over-traveling or not closing fully. Refer to the user manual for specific instructions, as settings vary by model. Accurate adjustment enhances safety and ensures smooth operation, reducing wear on the door and opener components over time.
Fixing Remote Control Issues
Address remote control problems by replacing batteries, reprogramming the remote, or checking for interference from other devices. Ensure proper alignment and functionality for reliable operation.
Replacing the Remote Control Batteries
Start by turning the remote over and sliding off the battery cover. Gently pull out the old batteries and insert new ones, ensuring correct polarity. Replace the cover and test the remote. If it works, the issue was resolved. If not, check for corrosion or damage inside the battery compartment and clean it if necessary. Always use the recommended battery type for optimal performance. This simple step often resolves remote control issues quickly and effectively.
Reprogramming the Remote Control
To reprogram the remote control, start by pressing and holding the “Learn” button on the garage door opener until the indicator light blinks. Release it and select the remote type (e.g., 3-button or 4-button). Follow the on-screen instructions or refer to the manual for specific steps; Test the remote to ensure it works properly. If issues persist, repeat the process or reset the opener. Always consult the user manual for model-specific instructions to ensure successful reprogramming and restore remote functionality effectively.
Checking for Interference from Other Devices
Interference from other devices can disrupt the remote control’s signal. Common culprits include cordless phones, security systems, and nearby Wi-Fi routers. To address this, unplug or relocate such devices and test the remote again. If the issue persists, try reprogramming the remote to ensure it operates on a clear frequency. Additionally, check for physical obstructions between the remote and the opener. If interference continues, consult the user manual for guidance on adjusting settings or updating the opener’s firmware to minimize signal conflicts and restore reliable operation.

Diagnosing and Repairing Motor Issues
Check the power supply and ensure the motor is receiving electricity. Inspect for overheating or unusual noises. If issues persist, consider replacing the motor capacitor or consulting a professional.
Checking the Power Supply
Ensure the garage door opener is properly plugged into a functioning electrical outlet. Verify that the circuit breaker or fuse hasn’t tripped or blown. If the outlet is shared with other devices, try plugging the opener directly into a dedicated outlet. Check all connections for looseness or damage. If the issue persists, consult a licensed electrician to inspect the wiring and electrical supply. A stable power supply is crucial for the motor to operate correctly, so addressing this step is essential before moving on to other potential issues.
Inspecting the Motor for Overheating
Turn off the power supply and allow the motor to cool before inspection. Check for signs of overheating, such as discoloration, burning smells, or excessive warmth. Ensure proper ventilation around the motor by cleaning dust from vents or grilles. Overheating can occur due to obstructed airflow or excessive use. If the motor frequently overheats, it may indicate a deeper issue, such as a malfunctioning capacitor or worn-out components. Addressing this promptly can prevent permanent damage and ensure smooth operation of your garage door opener.
Replacing the Motor Capacitor
Disconnect power and discharge the capacitor using a capacitor discharge tool to ensure safety. Locate the capacitor, typically near the motor, and remove the wires. Take note of the voltage and microfarad ratings to purchase the correct replacement. Install the new capacitor, securing it firmly. Reconnect the wires and reassemble any covers. Test the motor to ensure proper operation. If unsure, consult a professional to avoid electrical hazards. Regular capacitor checks can prevent future motor issues, ensuring your garage door opener runs smoothly and efficiently.
Reducing Excessive Noise from the Garage Door Opener
Lubricate the chain or belt drive with garage door lubricant to minimize friction. Tighten loose bolts and screws, and replace worn-out parts like rollers or hinges to reduce noise effectively.
Lubricating the Chain or Belt Drive
Apply a high-quality garage door lubricant to the chain, belt, or screw drive to reduce friction and noise. Avoid using grease, as it attracts dust and dirt. Instead, opt for a silicone-based spray lubricant. Spray the lubricant evenly across the moving parts, ensuring complete coverage. Wipe off any excess lubricant with a clean cloth to prevent drips. Regular lubrication helps maintain smooth operation and extends the lifespan of your garage door opener. This simple step is essential for minimizing noise and ensuring optimal performance.
Tightening Loose Bolts and Screws
Tightening loose bolts and screws is crucial for ensuring the stability and proper functioning of your Craftsman 1/2 HP garage door opener. Use a wrench to secure any loose hardware on the opener unit, mounting brackets, and door tracks. Over time, vibrations can cause fasteners to loosen, leading to noise and operational issues. Regularly inspect and tighten all bolts and screws to maintain smooth operation. This simple maintenance step can prevent more serious problems and extend the lifespan of your garage door opener. Always ensure the door is closed before making adjustments for safety.
Replacing Worn-Out Parts
Replacing worn-out parts is essential for maintaining the performance of your Craftsman 1/2 HP garage door opener. Commonly, the chain, belt, or gear system may wear out over time, causing noise or operational issues. Inspect these components regularly and replace them if damaged. Use high-quality replacement parts, such as the Sommer opener’s gear assembly, to ensure durability. Always disconnect power before performing repairs. Replacing worn parts promptly prevents further damage and ensures smooth, quiet operation. This step is vital for extending the lifespan of your garage door opener and maintaining its reliability. Regular inspections can help identify worn parts early.
Advanced Troubleshooting Techniques
Advanced troubleshooting involves diagnosing complex issues using specialized tools and diagnostic methods, ensuring persistent problems are resolved efficiently for optimal garage door opener performance and longevity.
Checking the Circuit Board for Faults
To diagnose circuit board issues, start by inspecting for visible damage, such as burn marks or cracked components. Ensure all connections are secure and not loose. If the board appears damaged or corroded, it may need replacement. Use a multimeter to test for continuity and voltage. If the board fails to respond, it could indicate a faulty logic board or sensor malfunction. In such cases, replacing the circuit board is necessary. Refer to the user manual or a professional for guidance. A faulty circuit board can cause unpredictable behavior, such as erratic operation or complete system failure.
Inspecting the Gear and Sprocket Assembly
Inspect the gear and sprocket assembly for wear, such as cracked or stripped teeth. Lubricate moving parts to reduce friction. Replace any damaged components to ensure smooth operation. Check for proper alignment and tighten loose connections. Regular maintenance prevents premature wear and extends the opener’s lifespan. If gears are worn out, consider replacing the entire assembly for optimal performance. A well-maintained gear system ensures quiet and efficient door operation, reducing the risk of mechanical failure. Always follow safety guidelines when handling these components to avoid injury or further damage.
Testing the Safety Reversal System
Test the safety reversal system by obstructing the sensors while the door closes. If working correctly, the door should reverse. Clean the sensor lenses and ensure they are aligned properly. Check for loose wires or damaged sensors. If the system fails, refer to the manual for reset instructions. Regular testing ensures the door operates safely, preventing accidents. A functioning reversal system is essential for compliance with safety standards and protecting people and pets from injury. Always prioritize this test during routine maintenance to guarantee reliable performance.

Maintenance Tips to Prevent Future Issues
Regular lubrication of moving parts, cleaning safety sensors, and inspecting door balance ensure smooth operation and prevent future issues with your Craftsman garage door opener.
Regular Lubrication of Moving Parts
Regular lubrication of moving parts is essential for smooth operation. Use silicone-based spray or white lithium grease on the chain, belt, hinges, and rollers. Avoid using grease, as it attracts dust. Lubricate the screw drive if applicable. This reduces friction and noise, preventing wear and tear. Apply lubricant every 6-12 months or when noises arise. Wipe off excess with a cloth to avoid drips. Proper lubrication ensures the garage door opener runs efficiently and prolongs its lifespan. Always test the door after lubrication to ensure it operates smoothly.
Cleaning the Safety Sensors
Cleaning the safety sensors is crucial for proper garage door operation. Use a soft cloth to wipe the sensor lenses, removing dirt, dust, or moisture. Misaligned or dirty sensors can cause the door to reverse or not close. Check the sensors’ alignment and ensure they are securely fastened. If cleaning doesn’t resolve issues, realign the sensors by adjusting their positions. Test the door after cleaning to ensure smooth operation. Regular cleaning prevents interference and ensures the safety reversal system functions correctly, maintaining reliability and safety for your garage door opener.
Inspecting the Door Balance
Inspecting the door balance is essential for smooth operation. A properly balanced door ensures even weight distribution, reducing strain on the opener. To check, disconnect the opener and manually move the door. It should lift evenly and stay in place when partially open. If it sags or feels heavy, the springs may need adjustment. Misalignment or worn parts can also affect balance. Regular inspections help prevent issues like uneven closing or excessive noise. Addressing balance problems early avoids further damage and ensures safe, efficient operation of your garage door opener system.
When to Call a Professional
If issues persist after basic troubleshooting or involve complex components like circuit boards or gears, consult a professional to ensure safety and proper repairs.
Identifying Symptoms That Require Professional Help
Certain issues with your Craftsman 1/2 HP garage door opener may require professional intervention. If the motor fails to respond despite a proper power supply, or if the circuit board shows signs of damage, it’s best to seek expert help. Additionally, if the door’s reversing mechanism malfunctions after adjusting sensors and force settings, or if there’s significant noise from the gear assembly, a professional can diagnose and repair complex faults safely and efficiently. Always prioritize safety when dealing with electrical and mechanical components.
Finding a Reliable Garage Door Technician
When seeking professional help for your Craftsman 1/2 HP garage door opener, ensure the technician is licensed, insured, and experienced. Check online reviews and ask for referrals from neighbors or friends. Look for certifications from reputable organizations and verify their expertise with your specific model. Be wary of technicians with no physical address or unclear pricing. A reliable technician will provide a detailed diagnosis and warranty their work, ensuring your garage door operates safely and efficiently. Prioritize professionals who offer emergency services and transparent communication.